Necessary tools:
- A set of BTR keys
- A soldering iron
- Tin
- A key of 8mm (for propellers)
- A 5.5mm key
- A cutting pliers
- Micro USB cable (as for most Android smartphones)
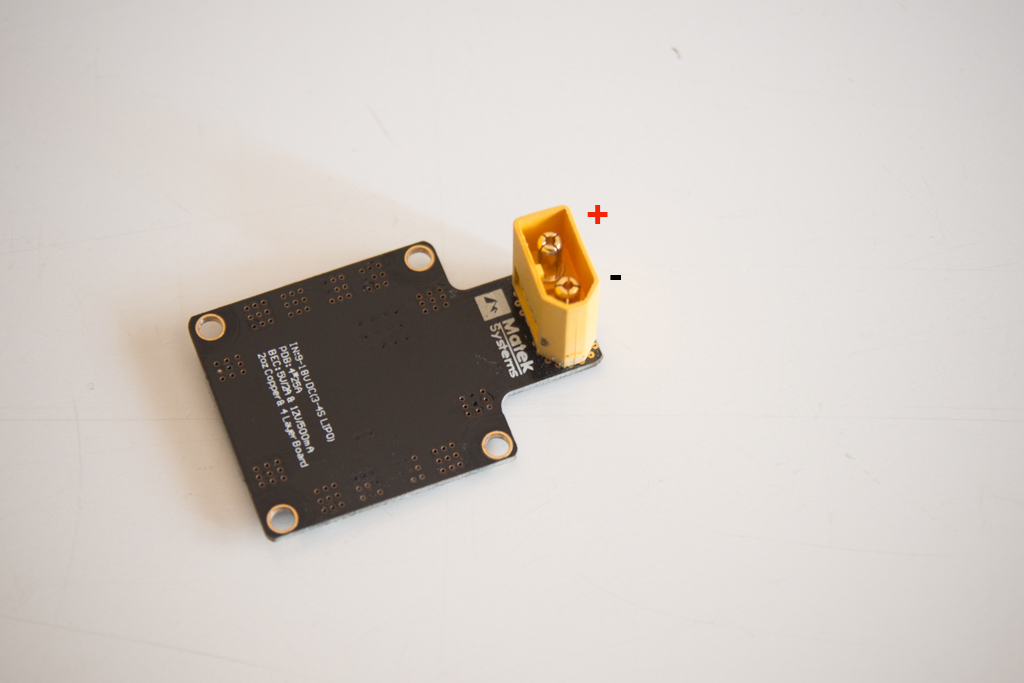
Solder the XT60 plug under the powerboard, pay attention to the polarity!
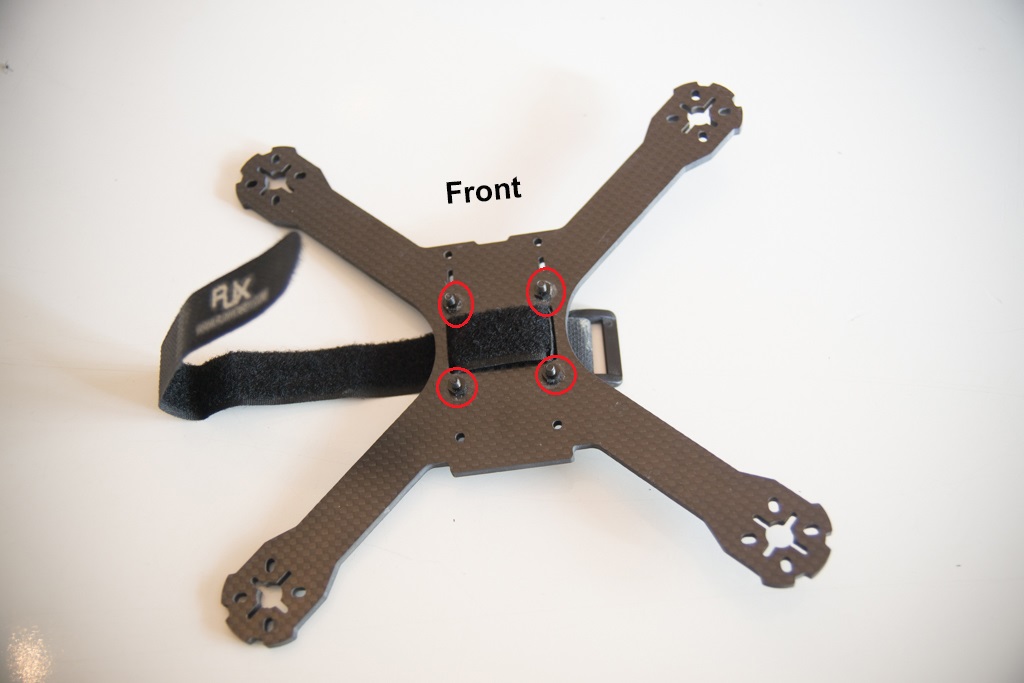
Put the m3x10 screws with plastic nuts, then pass the strap now because afterwards it will be more complicated!
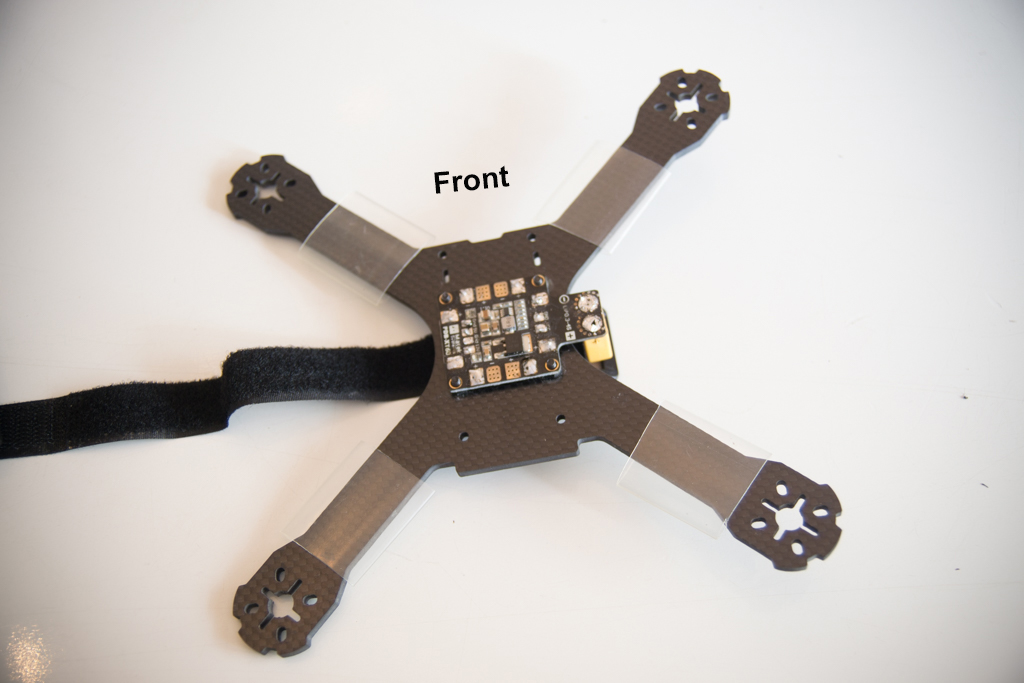
Thread a piece of heat-shrinkable sleeve over each arm and present the powerboard like this
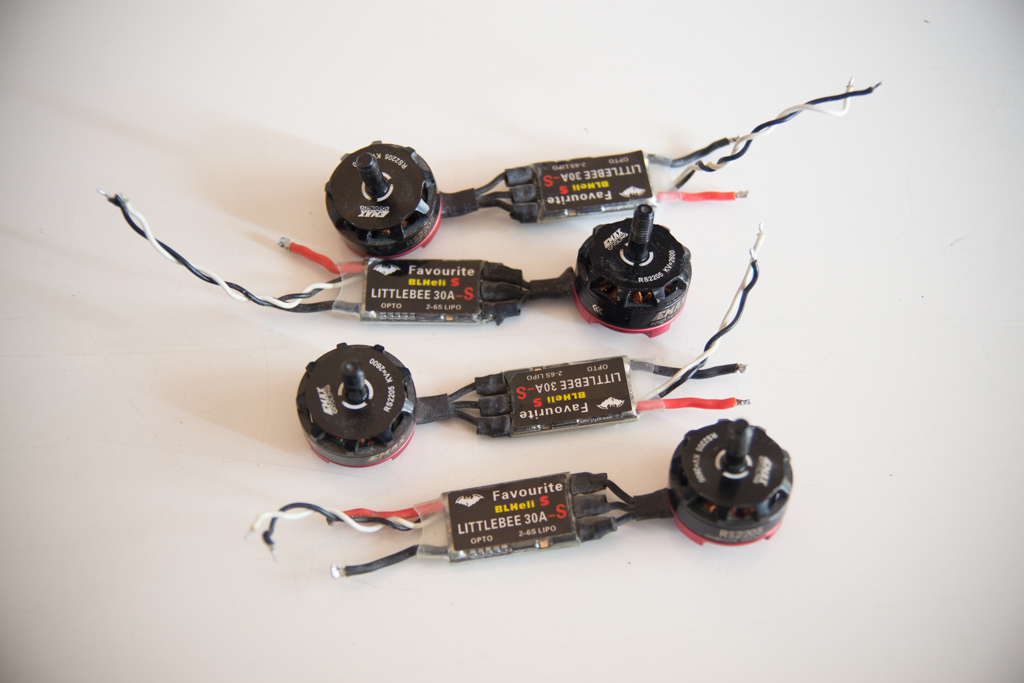
Shorten the motor cables and solder them to the ESC like this (do not forget to put heat shrink before soldering!)
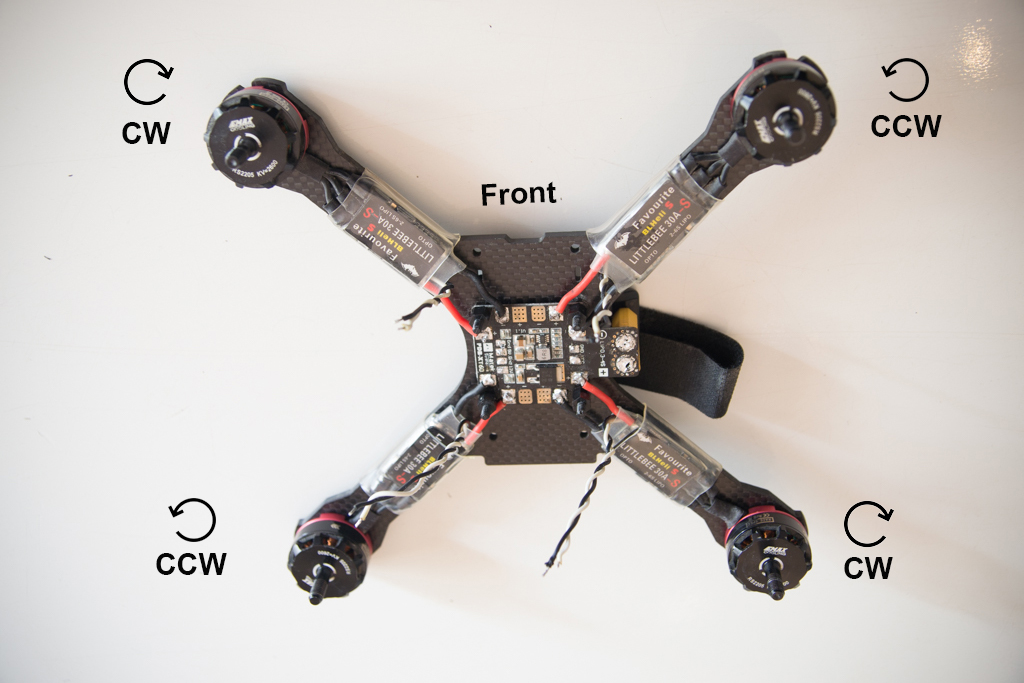
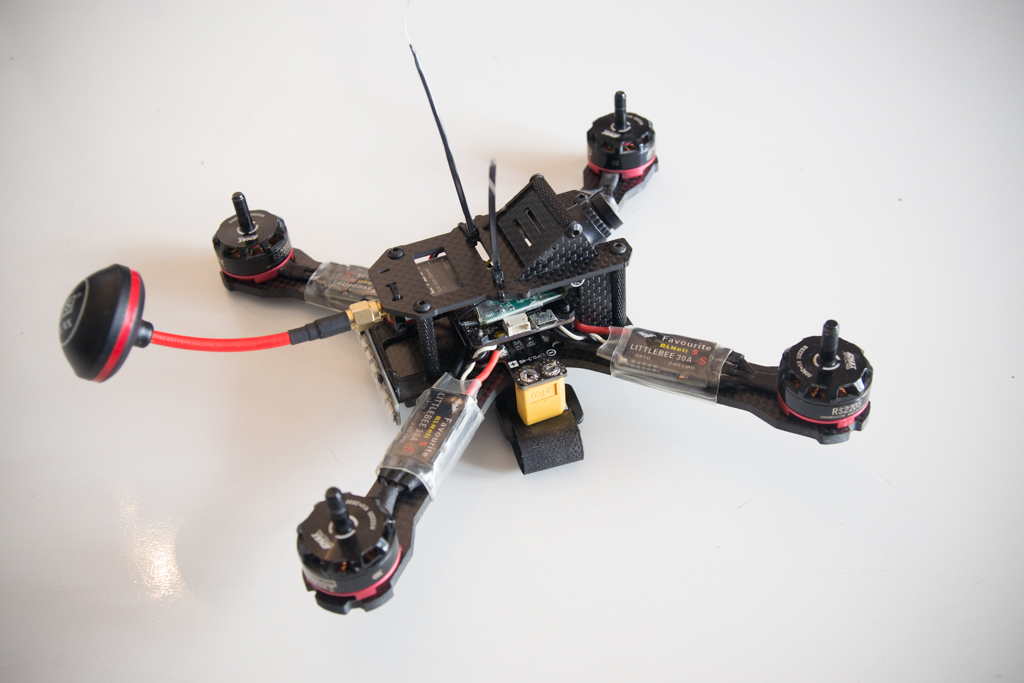
Thread the ESC under the heat shrink and fix the motors with 2 screws M3x6, be careful there are two CW (ClockWise) and two CCW (CounterClockWise) motors, mount them as in the photo, it is very important.
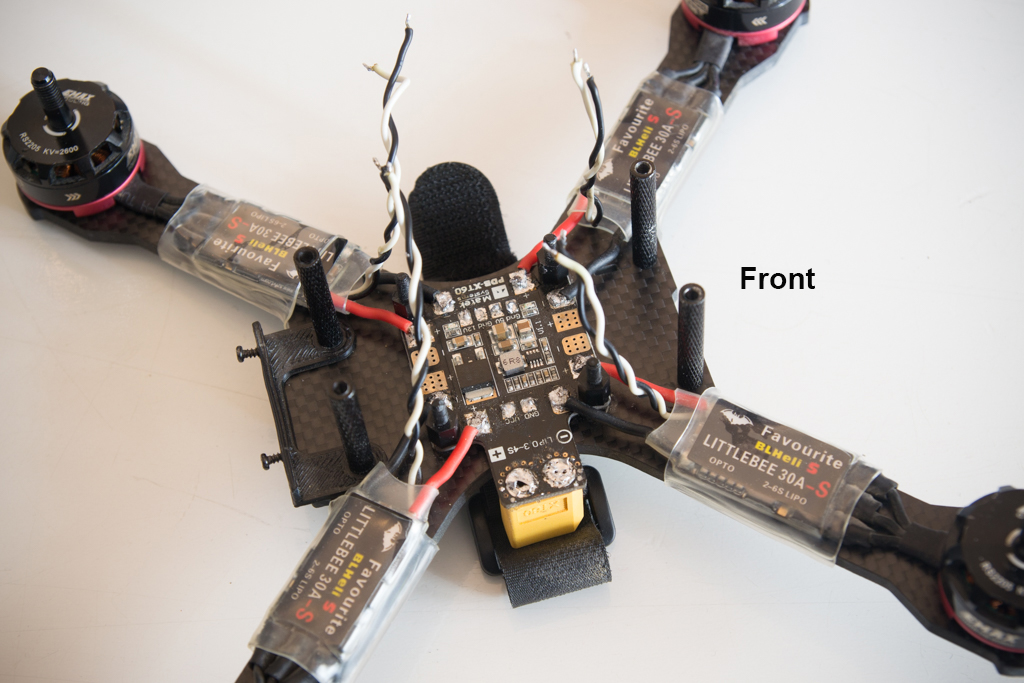
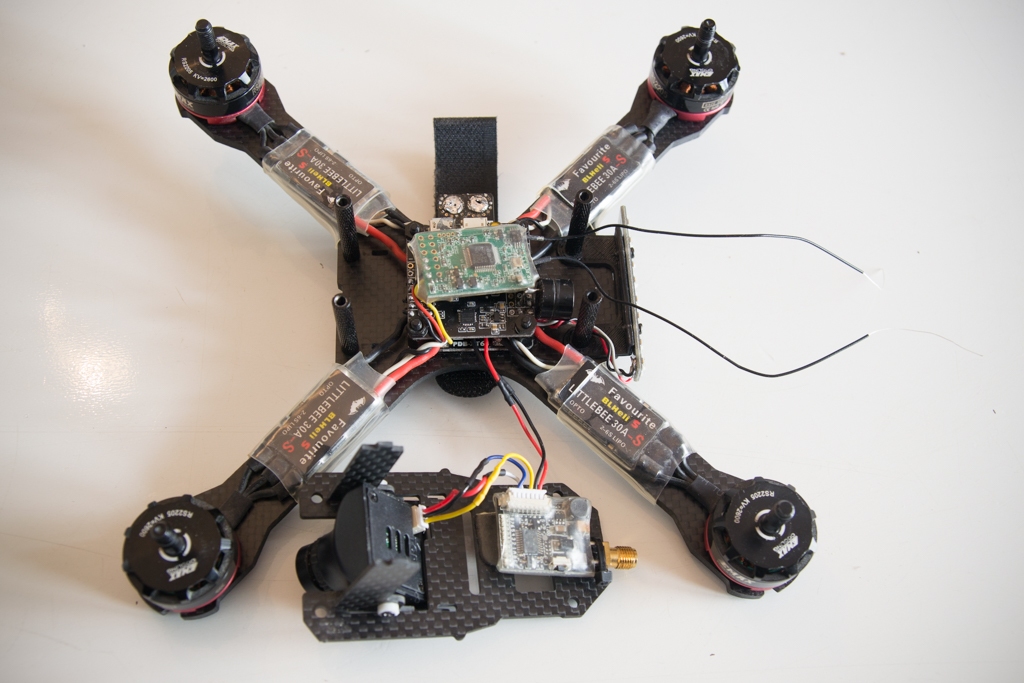
Solder the ESC power cables as shown, then screw the 4 plastic standoffs 6mm high, retract the heat shrink, and screw the 4 longs aluminum spacers.

Before we go to the wiring of the flight controller, we will cut a leg of the integrated 5v regulator under the flight controller board because we use that of the powerboard

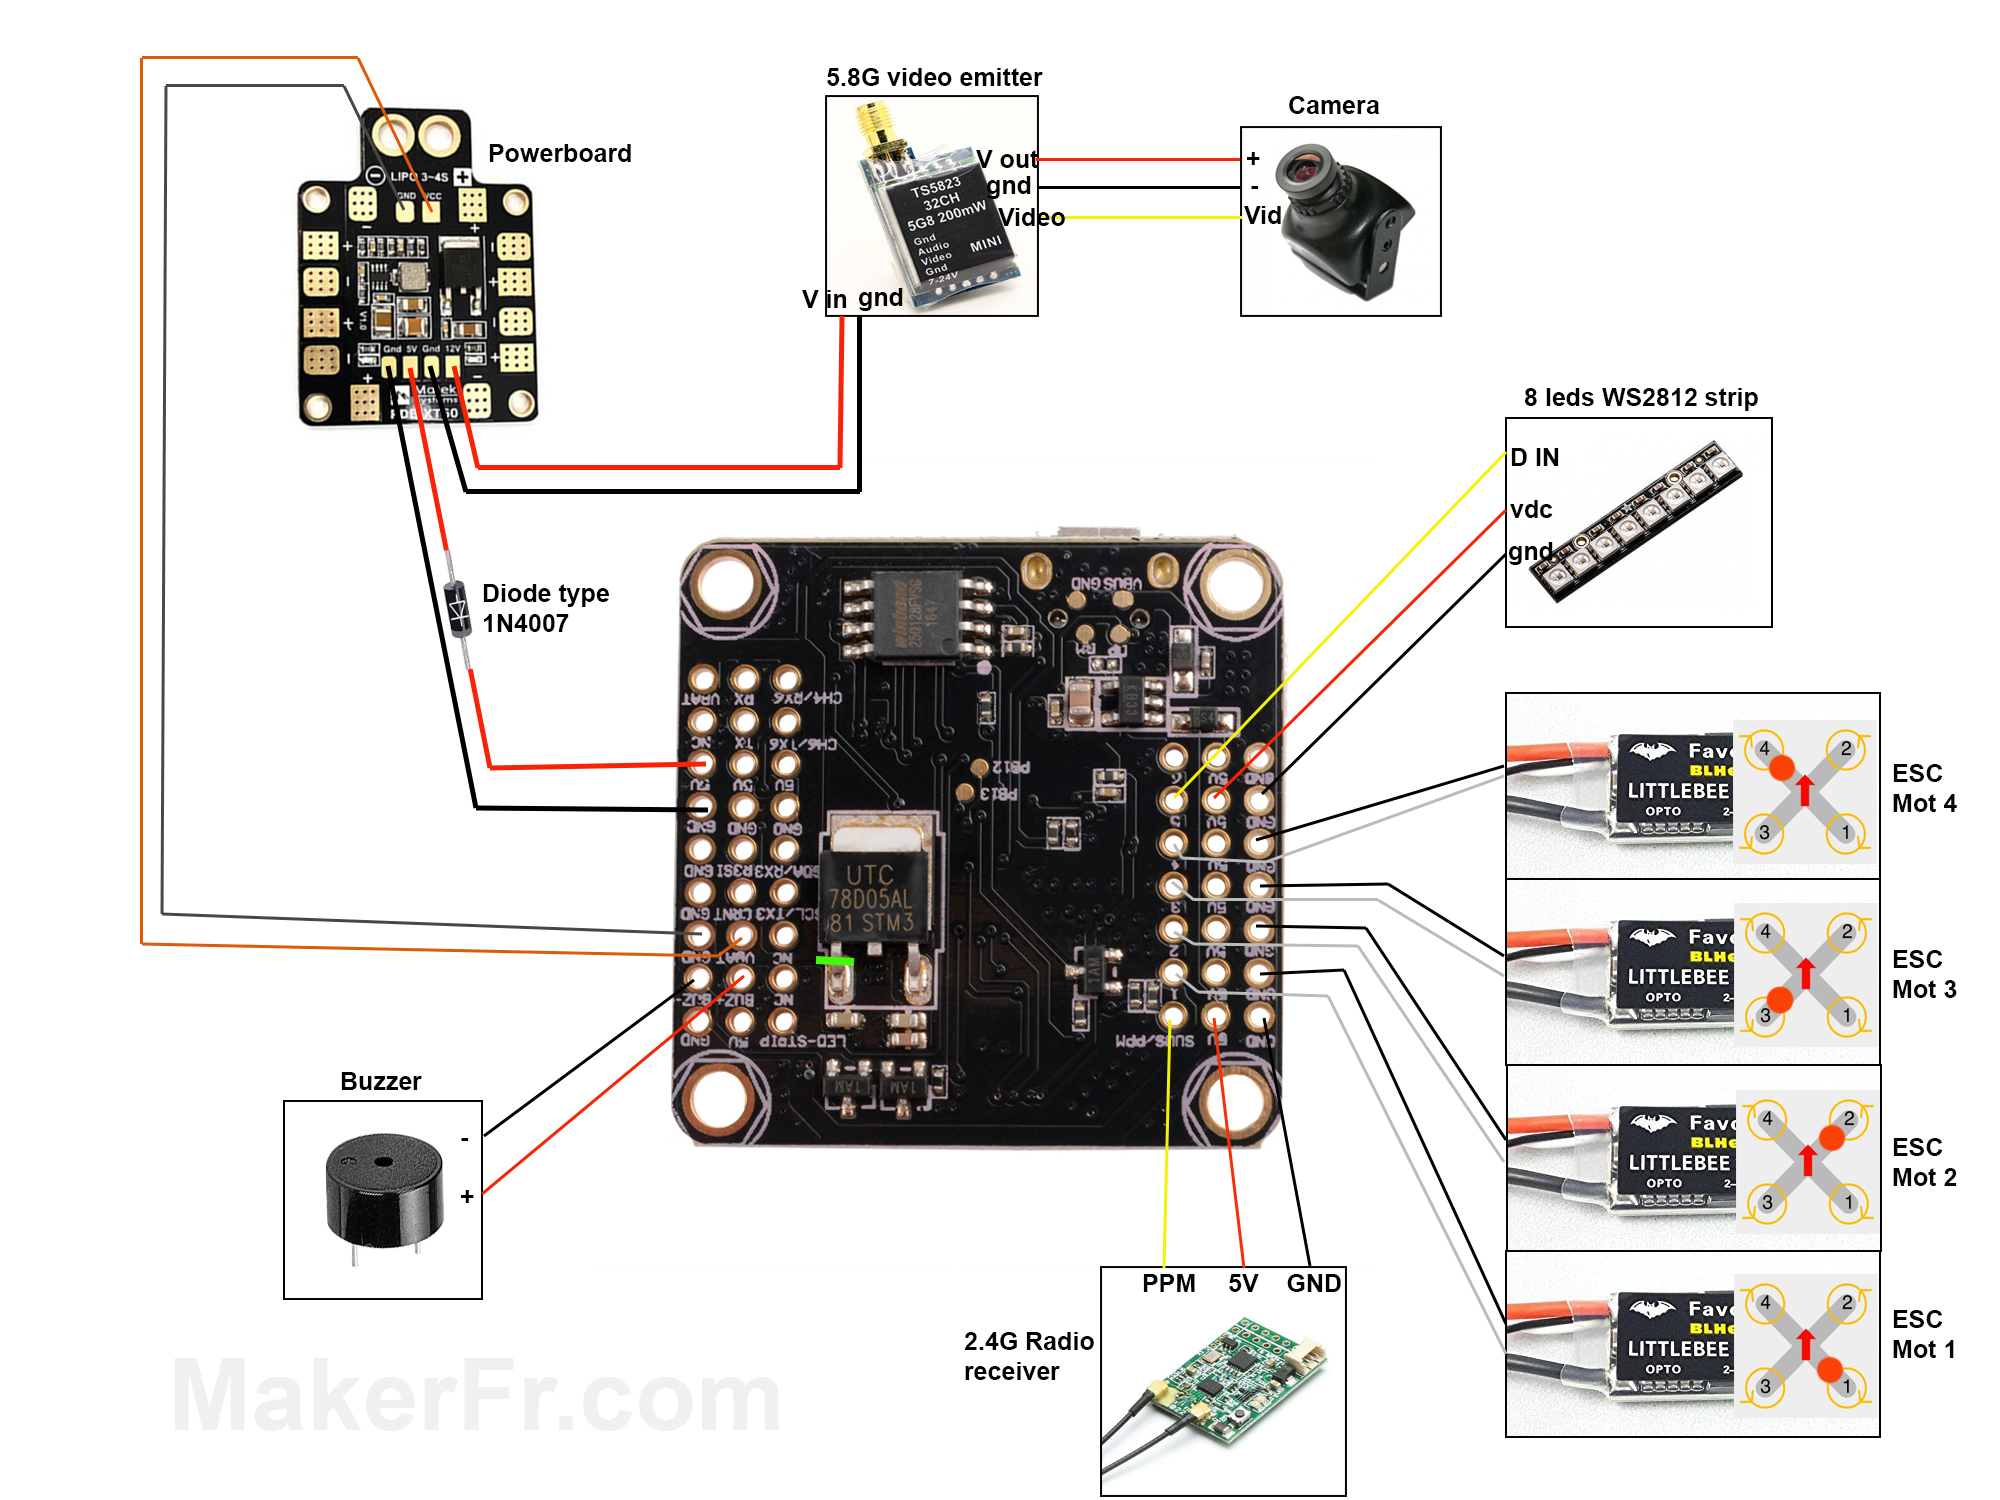
Now we will wire all that, I put a picture of the bottom because I cable everything from below (it’s cleaner) except the buzzer that I welded on the top (it is better to solder the buzzer once the radio control will be configured, otherwise it will beep long to say that it has no radio signal)
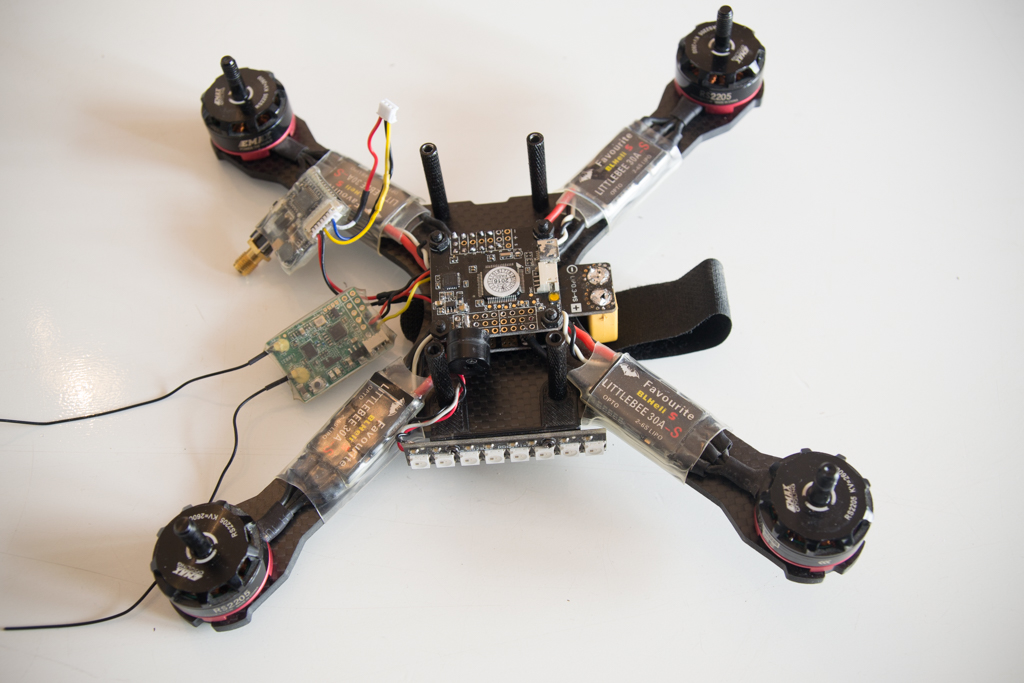
That’s where we are:
Assemble the upper part of the chassis, at the back of the camera there is an inscription “top” which must of course be up!
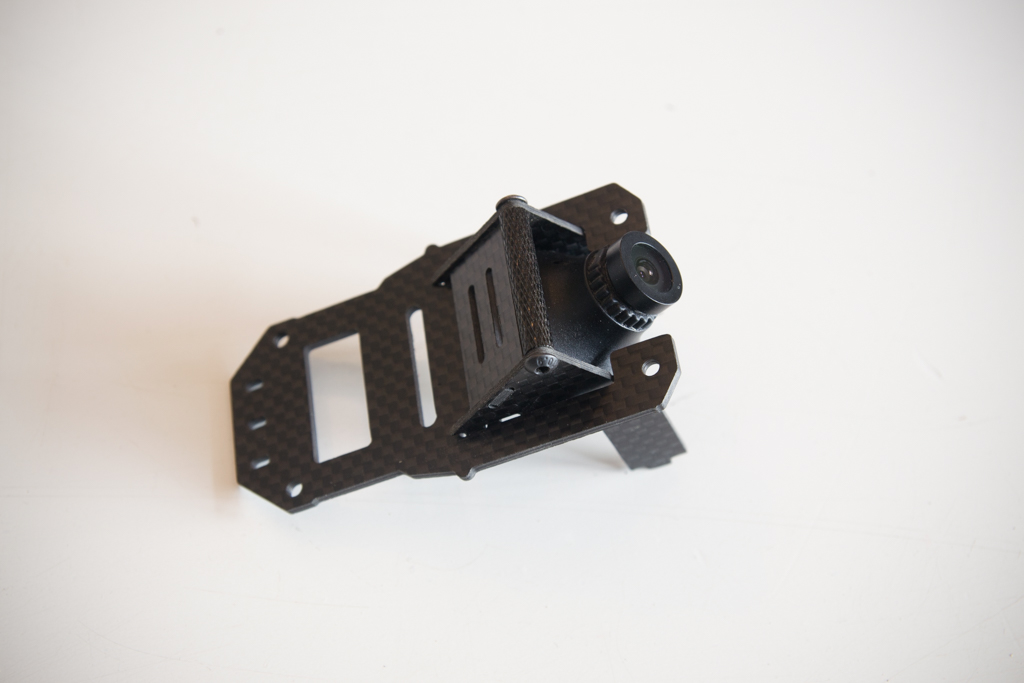
Fix the video transmitter with double-sided tape and a zip tie, put the radio receiver on the flight controller (if your receiver is naked, it must first be covered with the same heat shrink as the ESC.
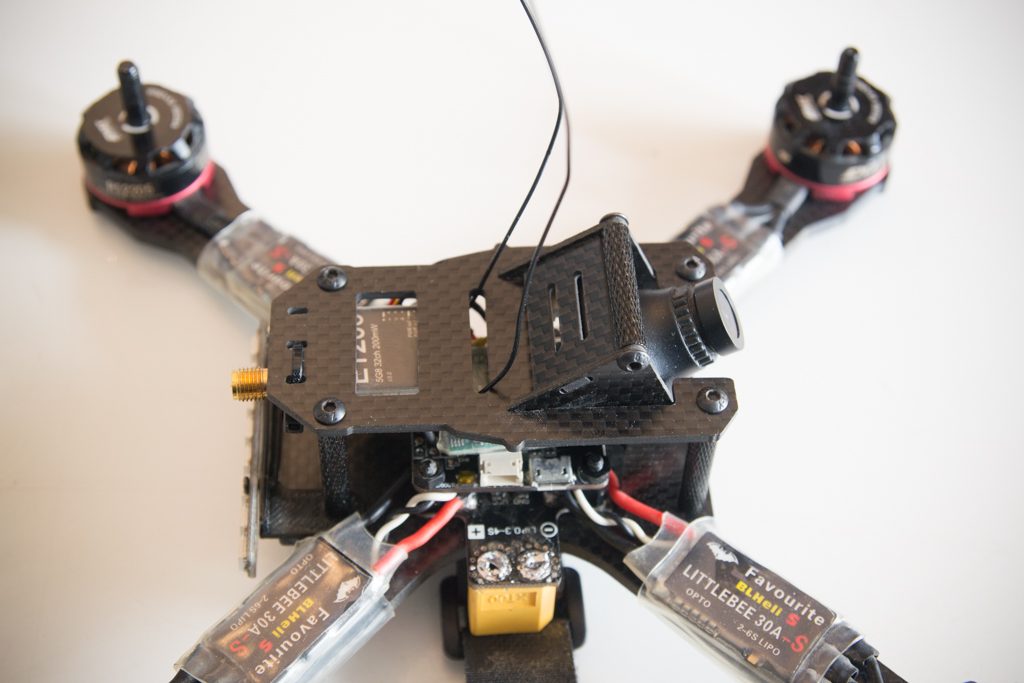
We put it all together, we make sure that the front part of the chassis does not damage the ESC power cables at the front, if necessary, round the corners to the file.
Pass the antenna wires through the slot
Put two Zip ties like this, go through the heat shrink and retract it to have nice soft antennas

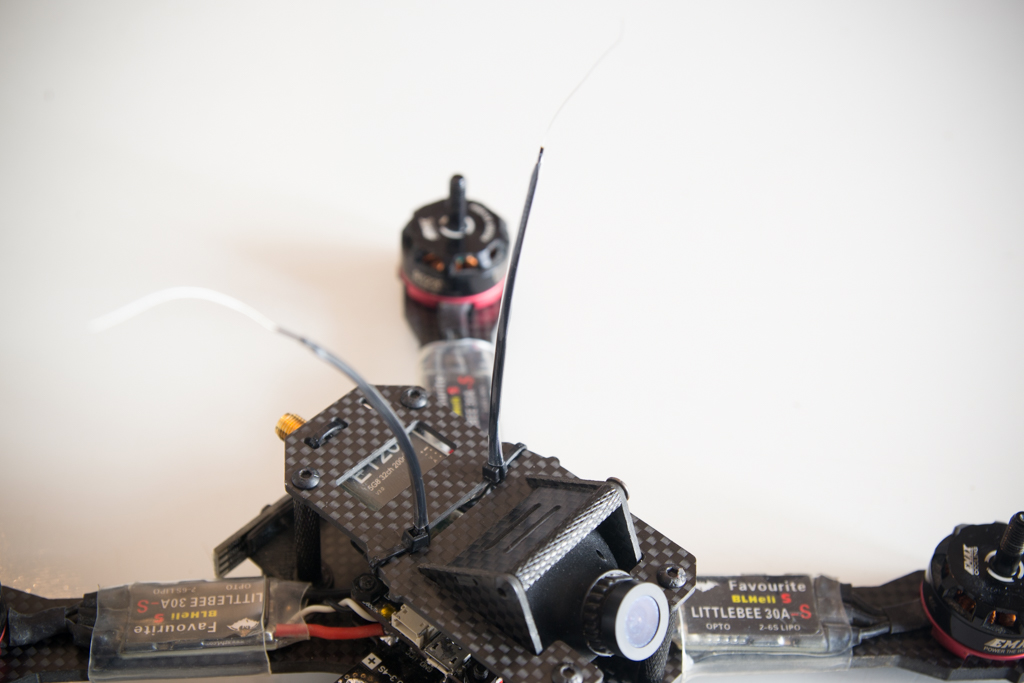
Do not forget to screw the antenna of the video transmitter because if you turn on the power without the antenna, the transmitter can burn !
For your safety, do not put propellers at this stage yet
Your racer X210 is mounted! We go to the configuration
PFFFF …j’ai commandé une naze 32 ….
Arf, j’ai déjà essayé deux Naze32 Chinoises, à chaque fois j’avais des problèmes de stabilité à cause du gyroscope utilisé qui rendait le drone instable
nonnnnnnn …je sait pas pourquoi j’étais sur que tu avais pris ça et du coup commandé !!
je vais devoir enplus comprendre comment elle fonctionne …pffff le naze 🙂
https://fr.aliexpress.com/item/Free-Shipping-Flip32-V2-3-Rev7-Flight-Controller-board-Update-of-Naze32-ACRO-PRO-with-brano/32345417732.html
Bah ça se monte aussi, ce sont juste tes branchements sur la Naze qui vont changer de mon schéma, mais j’ai pas trop aimé cette carte en vol comme je te disais, le gyroscope avait tendance à partir en cacahuète avec les vibrations.
Hello, est ce qu’il est possible d’avoir de la télémétrie avec ce contrôleur de vol et ce récepteur ? Retour batterie drone, altitude par exemple ?