Proceed in the same order as the tutorial.
Download Betaflight Configurator for your operating system and install it
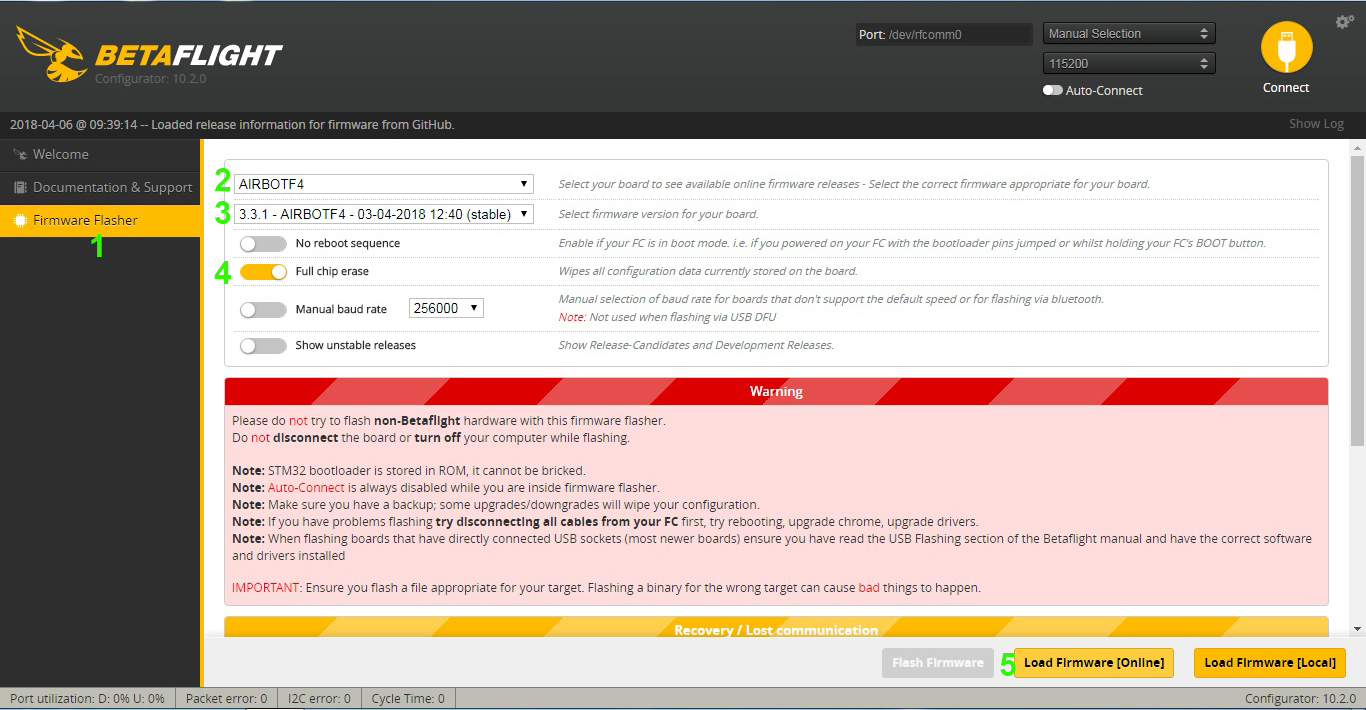
Once Betaflight open, we will click on “flash firmware” (1), we chose the firmware, for the flight controller that I listed, it is “AIRBOTF4” (2), below we chose the last stable version (3), we check “complete erasure of the chip” (4), we click on “Load a firmware online” (5) (do not connect the board now)
Once done, we take a micro USB cable (as on most Android smartphones), press the small button on the flight card with a fingernail or a pencil, and maintaining the pressure, we connect the card to the computer, once connected to the computer can release the button.

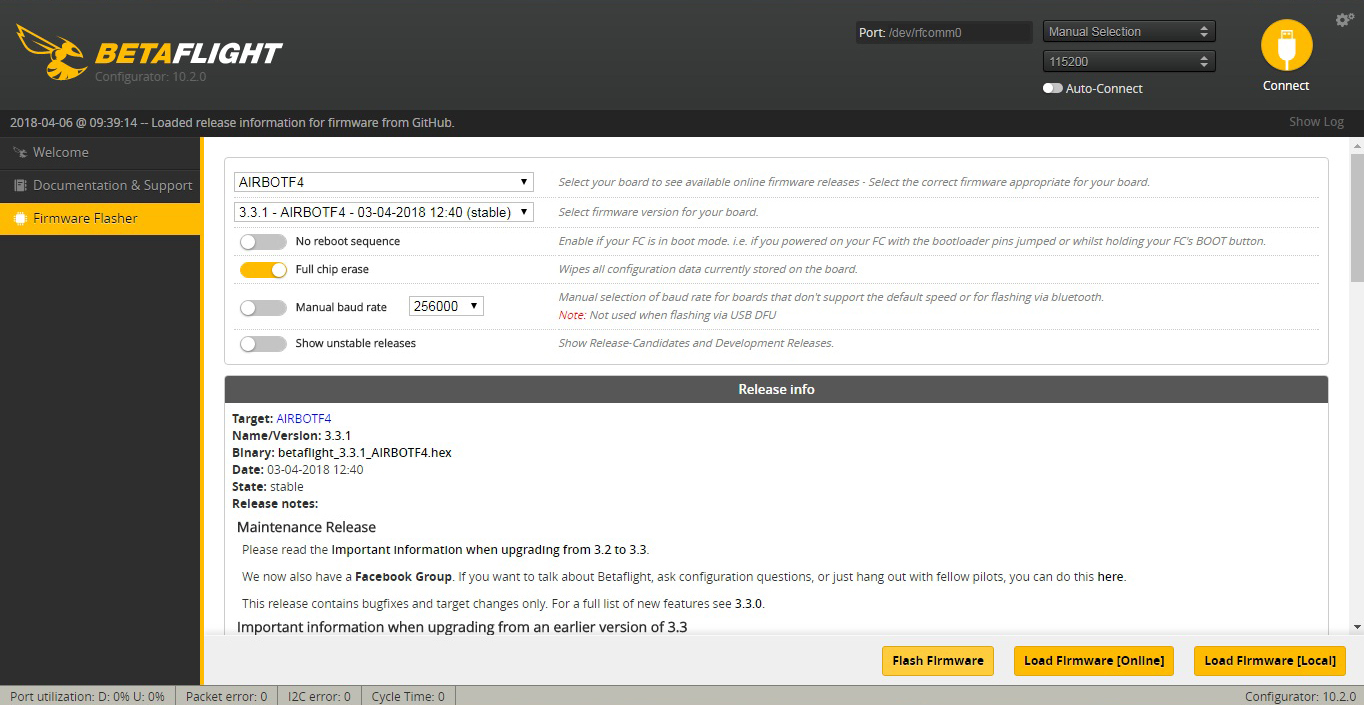
Now we click on “Flash firmware”
Once the card is flashed, unplug and reconnect the card to the USB port, then click on the big yellow “Connect” button at the top right of the Betaflight window
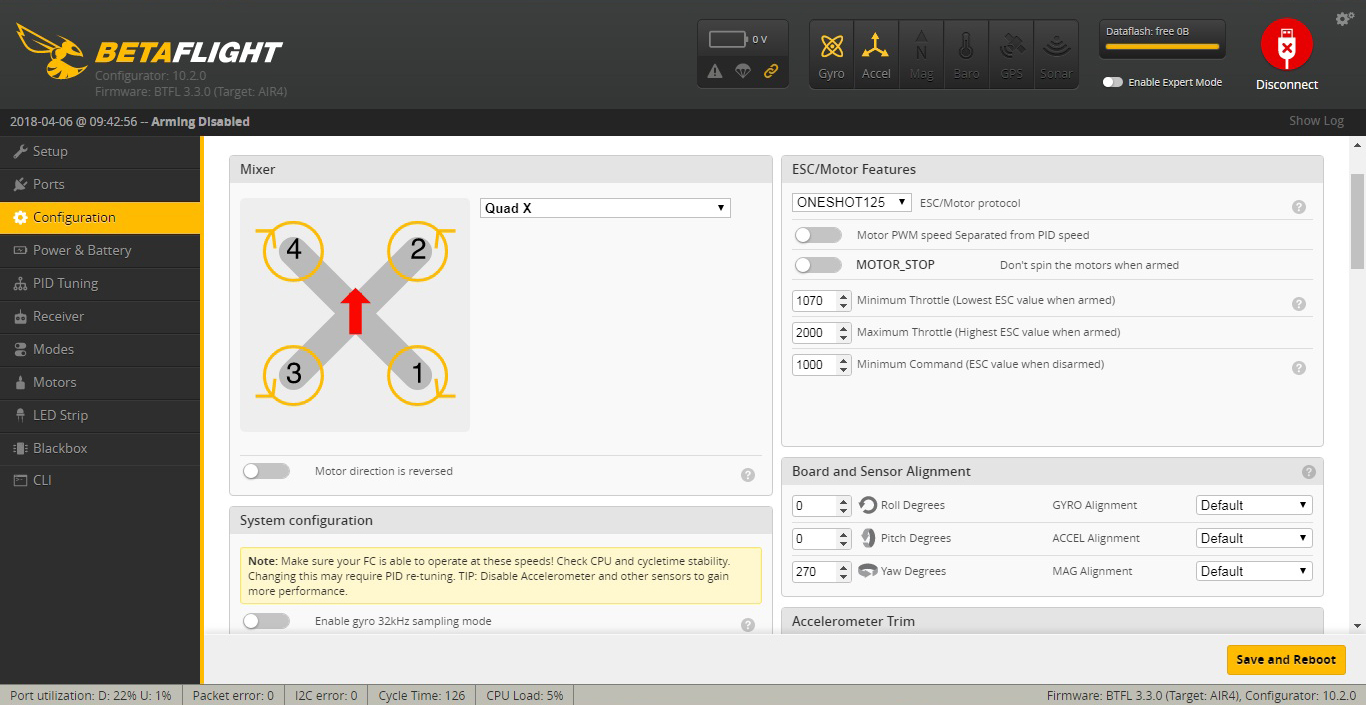
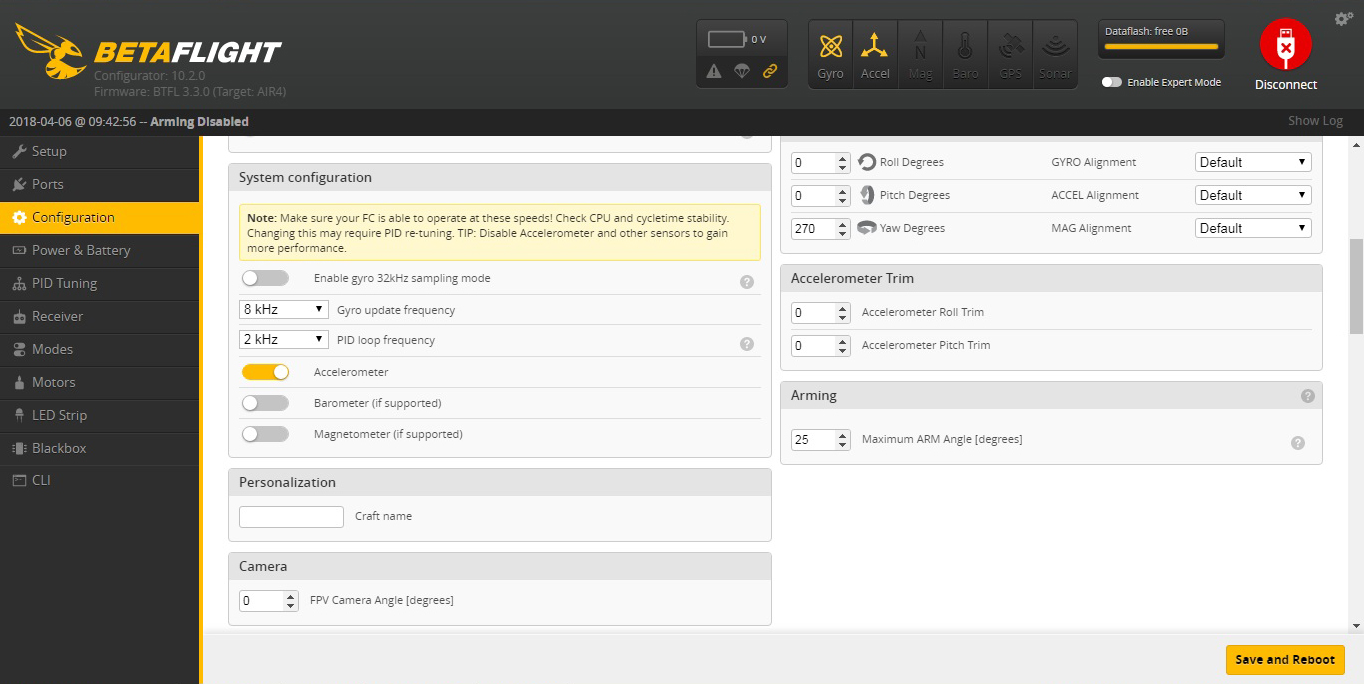
“Configuration” tab
We are in configuration “Quad X”, I leave “Motor stop” disabled, I personally prefer to have the engines running at slow when the throttle is at 0.
IMPORTANT: As we have mounted our side flightcontroller relative to the direction of travel to easily access the USB port, you must enter “270” in the “YAW degrees” field in the “board and sensor alignment” box.
For the receiver part, I configured it for my radio receiver “X4R” from FRsky which works in SBUS, it will be necessary to set it according to your type of receiver.
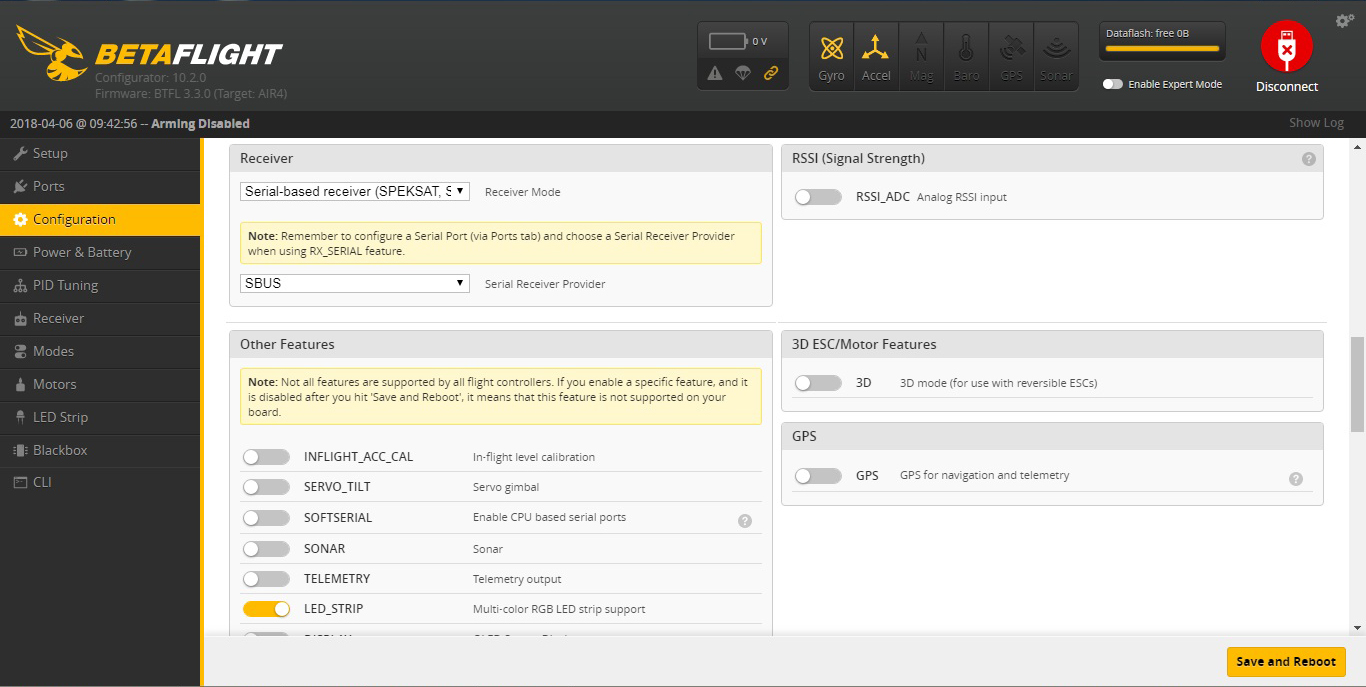
Then you have a whole range of options to activate, activate LED_STRIP if you have set the leds bar, and activate “AIRMODE” because it’s really more comfortable in the freestyle tricks (it is possible not to activate the Airmode here and assign him a lever in the “modes” tab)

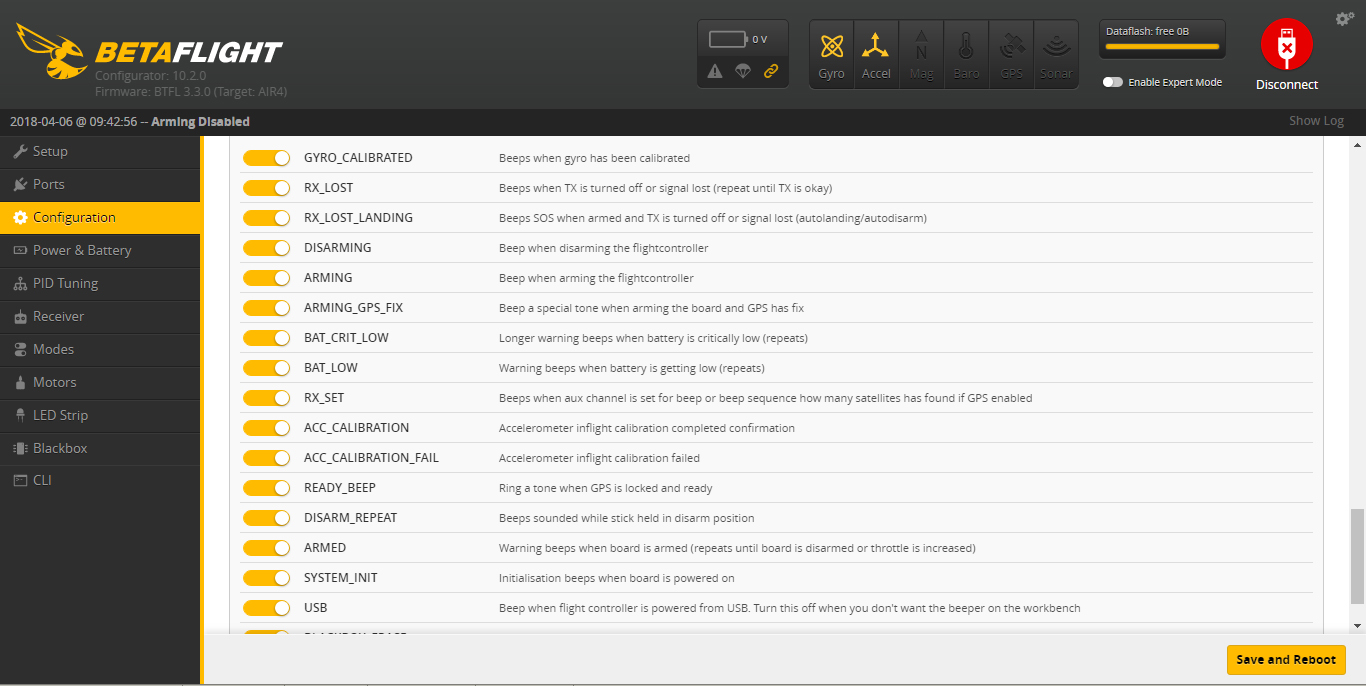
The last part of the Configuration tab is to configure when should sound the buzzer, by default everything is enabled, I leave it like that.
Do not forget to click on “Save” at the bottom of the page
“Ports” Tab
In this tab, do not touch the line “USB VCP”, you could disable the USB port of your card, which would be problematic!
We need to configure the UART1 line where our receiver is soldered, for my SBUS receiver I just had to activate “SERIAL RX”, to adapt according to your receiver
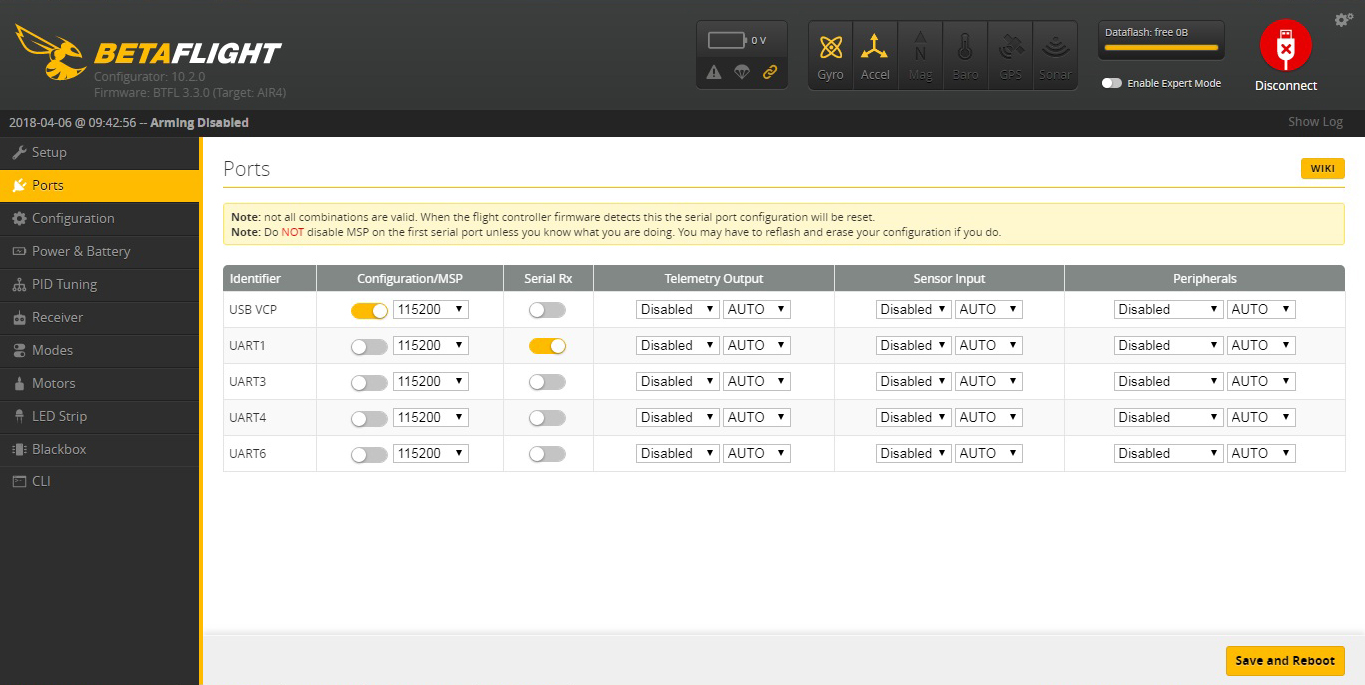
Do not forget to click on “Save” at the bottom of the page
“Receiver” Tab
It is necessary before having paired your receiver with your radio control, for that, refer to the manual of your receiver, if you do not have one, do a search Google with “Bind the-reference-of-my-receiver”
Once your receiver “binded” to your radio, you must see moving the gauges of each axis of the sticks you move, down to 1000 at the lowest, 1500 to neutral, 2000 levers thoroughly.
If nothing moves or is anarchy, review the UART1 config in the “Ports” tab or the Receiver section in the “Configuration” tab


Once everything is ok, don’t forget to click on “Save” at the bottom of the page
“Modes” Tab
In this part I show only the minimum subsistence, you can add other modes if you want according to your tastes and your auxiliary channels available.
For the choice of the flights modes, I use a lever 3 positions on the AUX1 of my radio, first position of the lever, nothing is selected, by default it will be the “ACRO” flight mode which will be taken in account (no stabilization), on the second position of the lever, it is the ANGLE mode is selected (beginner mode which prevents to turn back by taking too much angle), and last position of the lever, it is the HORIZON mode that is selected (mode that allows to perform acrobatics but which stabilizes when you put the levers to neutral)
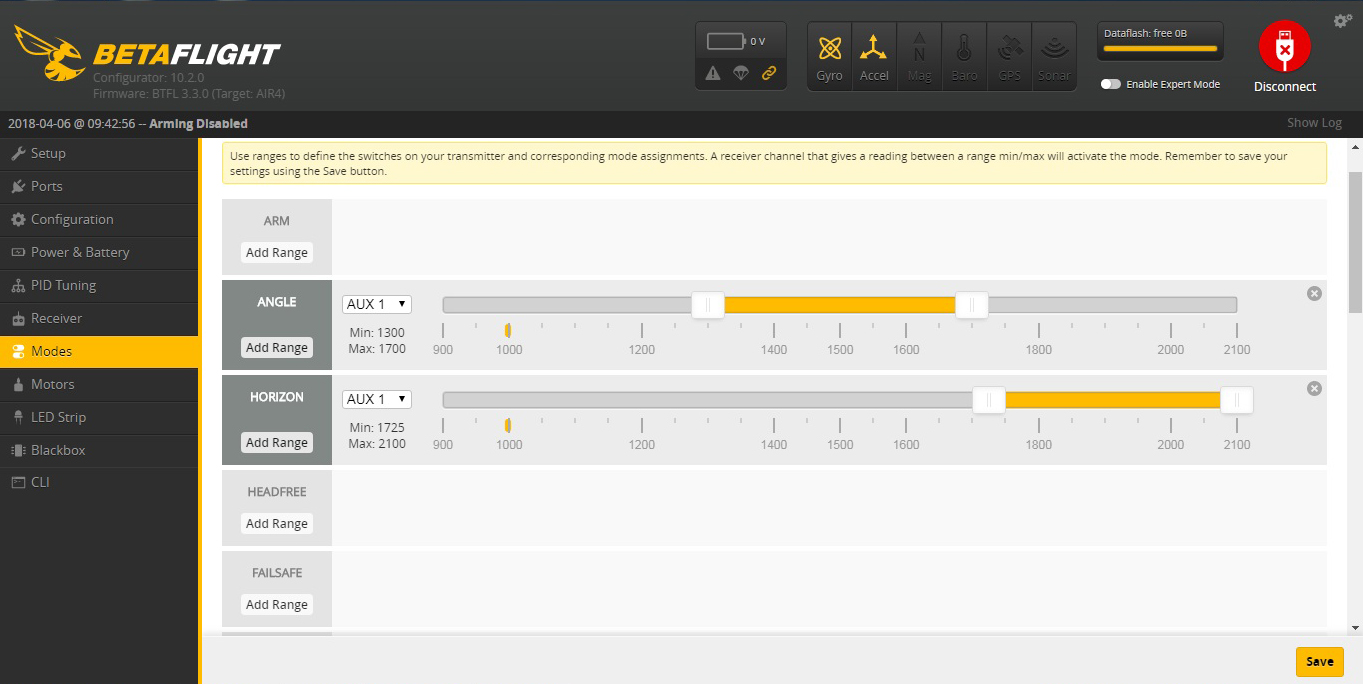
Then, essential, configure a lever 2 positions to be able to activate the buzzer (very practical when one is crashed and that one does not see our quad!)
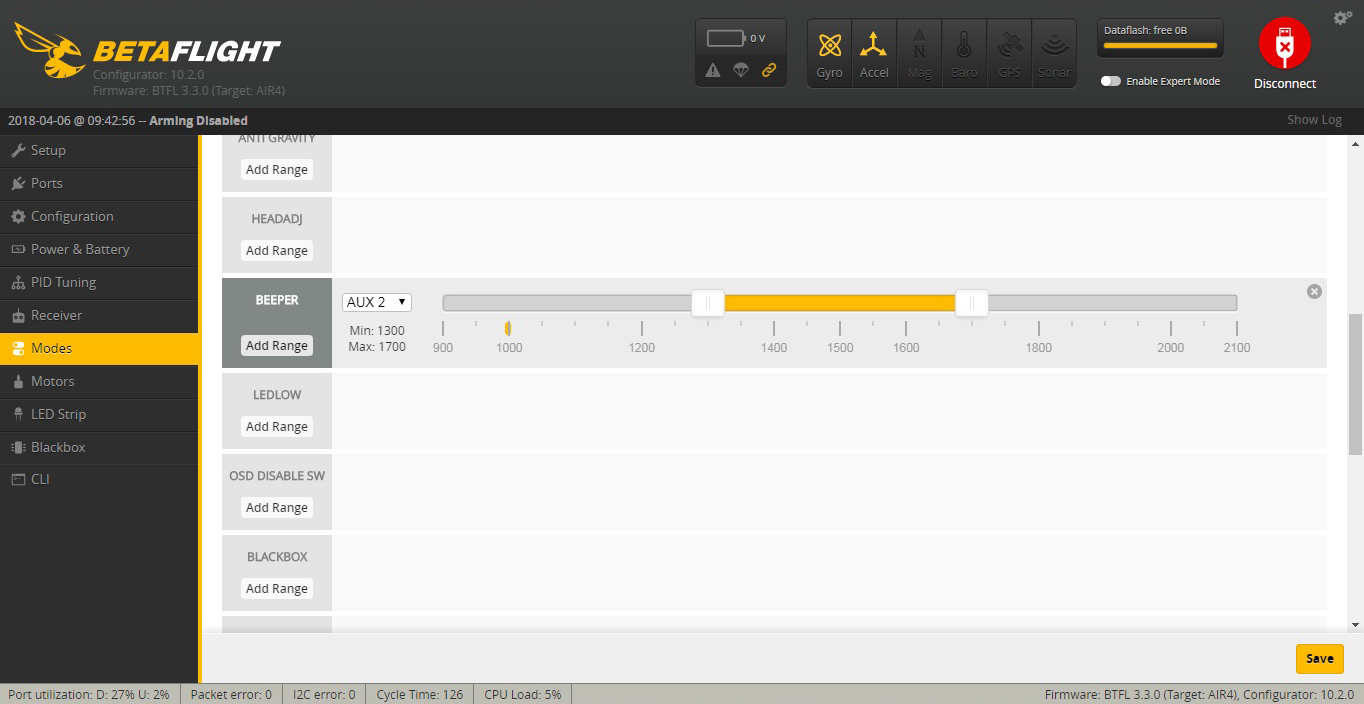
Do not forget to click on “Save” at the bottom of the page
Battery tab
configure as on the screenshot:

Flash and adjust your ESC
Betaflight is disconnected
Download BLHELI configurator for your operating system and open it.
- Click on “Read Setup” on the bottom right
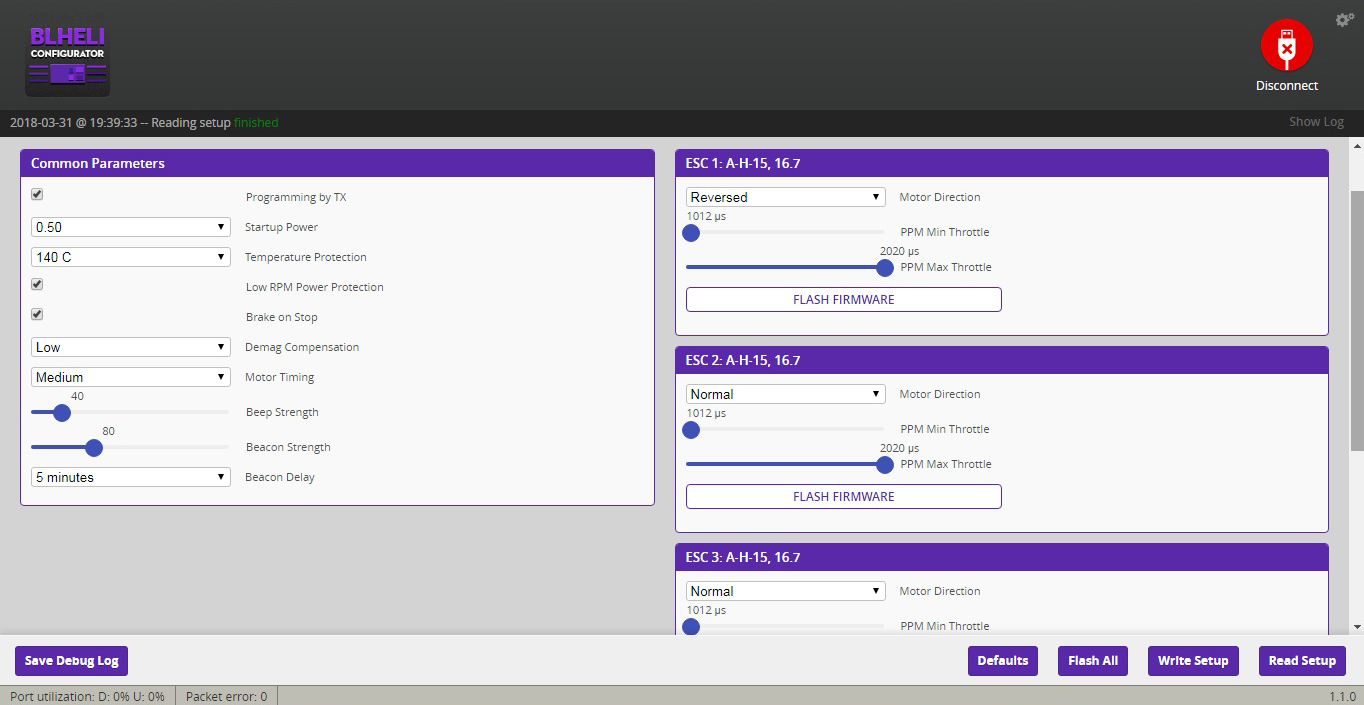
- In the box “Common Parameters”Activate “Brake on stop”, which will activate an electric brake when turning off the throttle, making the quad more responsive
- Putting the time you want in “Beacon delay” is the time that will elapse between the beginning of inactivity and when the ESC will start to beeping, which can be useful if your buzzer broke during a crash to find him.
Now for our 4 ESCs on the right:
- Motor 1: Reversed
- Motor2: Normal
- Motor3: Normal
- Motor4: Reversed
For PPM min throttle and PPM max throttle, normally it should be between 1000 and 2000, but my config only accepted 1012 – 2200us after disconnection, reconnection … mystery! In any case it does not affect our recent ESC.
- Click on Flash All
- Choose last firmware version
- Flash all
- Once the flash is finished for the 4 ESCs, we disconnect, and reconnect to see if our parameters have been saved and that our 4 ESCs are always well recognized.
General explanation video of BLheli Configurator:
Calibrate your ESC
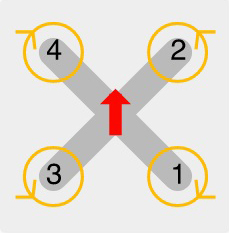
And we check that each engine runs in the appropriate direction:
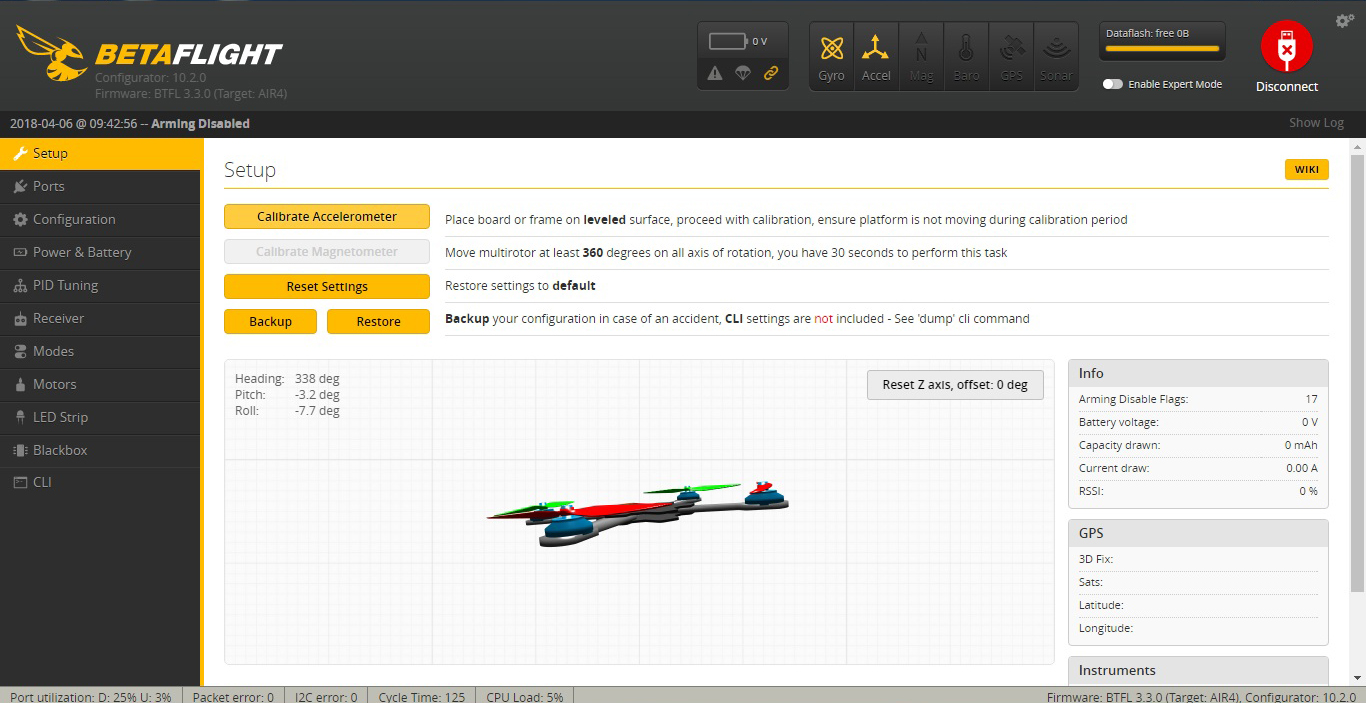
Calibrate the Gyroscope
For this your Quad must be perfectly flat, but not easy with the strap under the quad, suddenly, I use a large bowl !
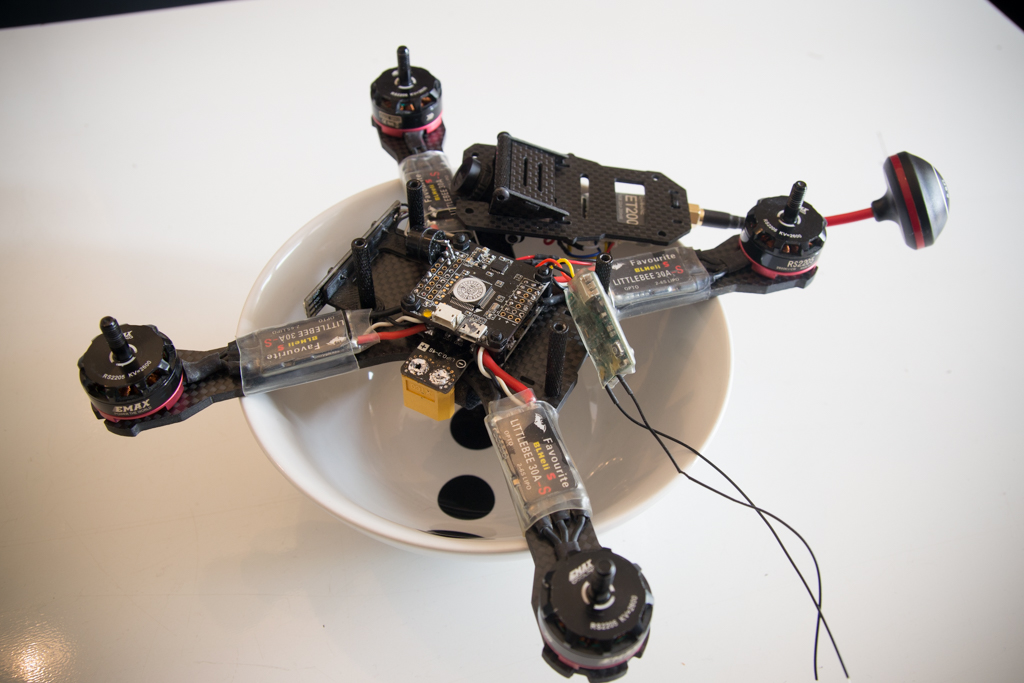
We reconnect with Betaflight, Installation tab, we check that our quad is perfectly flat, and we click on “Calibrate the accelerometer”
Led strip Configuration
Your Quad is set 🙂
Disconnect all
Put the props
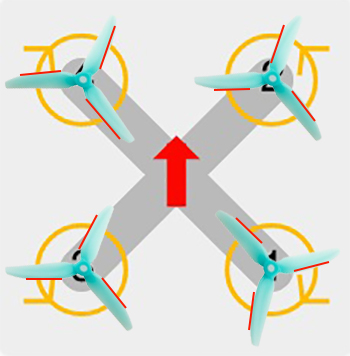
We have two CW + two CCW motors, it’s the same for our propellers.
We will locate the upper part of the blades, called the “leading edge”, highlighted here in red

Put the propellers with the leading edges in this direction:
Then screw the nuts with an 8mm wrench
- The nuts of the CCW motors are screwed in a classic clockwise
- The nuts of the CW motors are screwed counterclockwise
Your Quad is ready to fly!
For those who have never had a FPV Racer, visit this special beginners page