This is the custom way, to be able to modify and compile yoursel the firmware, for the easy way, it’s here
1. Install Atollic True Studio
– Download Atollic True Studio software
– launch the downloaded program.exe . The installation lasts several minutes.
– launch Atollic True Studio application after installation is complete
2. Copy the GRBL program
– Download the modified GRBL firmware for the 32 bit GRBL Board
– Unzip all files in a directory of your choice
3. Edit GRBL firmware
– Go to the directory where GRBL was uncompressed.
– Double click on the “.cproject” file.
– This should open the project in Atollic.

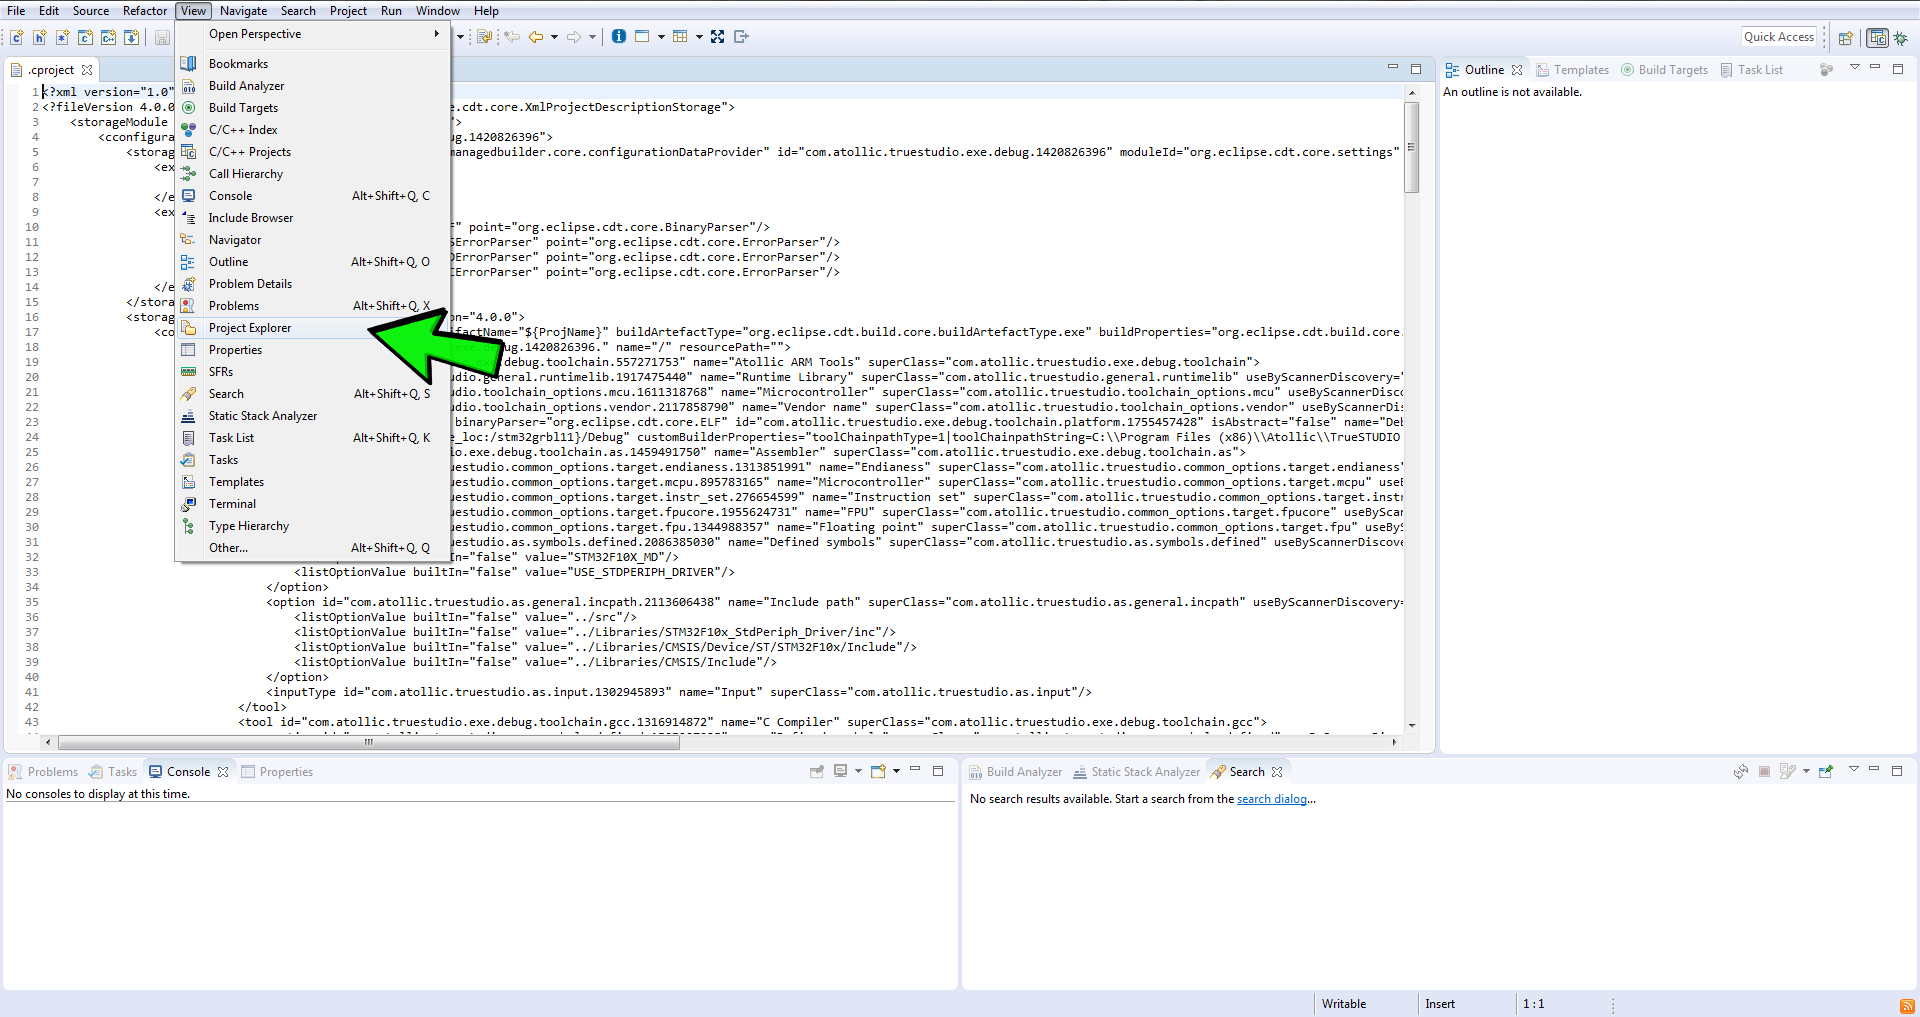
– In Atollic, when the project is open, display the list of all the files used: Click on the View menu and select the “Project Explorer” option.
This should add a window and show “stm32grbl11” folder
– Then in the top left, click on the folder “Stm32grbl11” to open it, then on the folder “inc”.
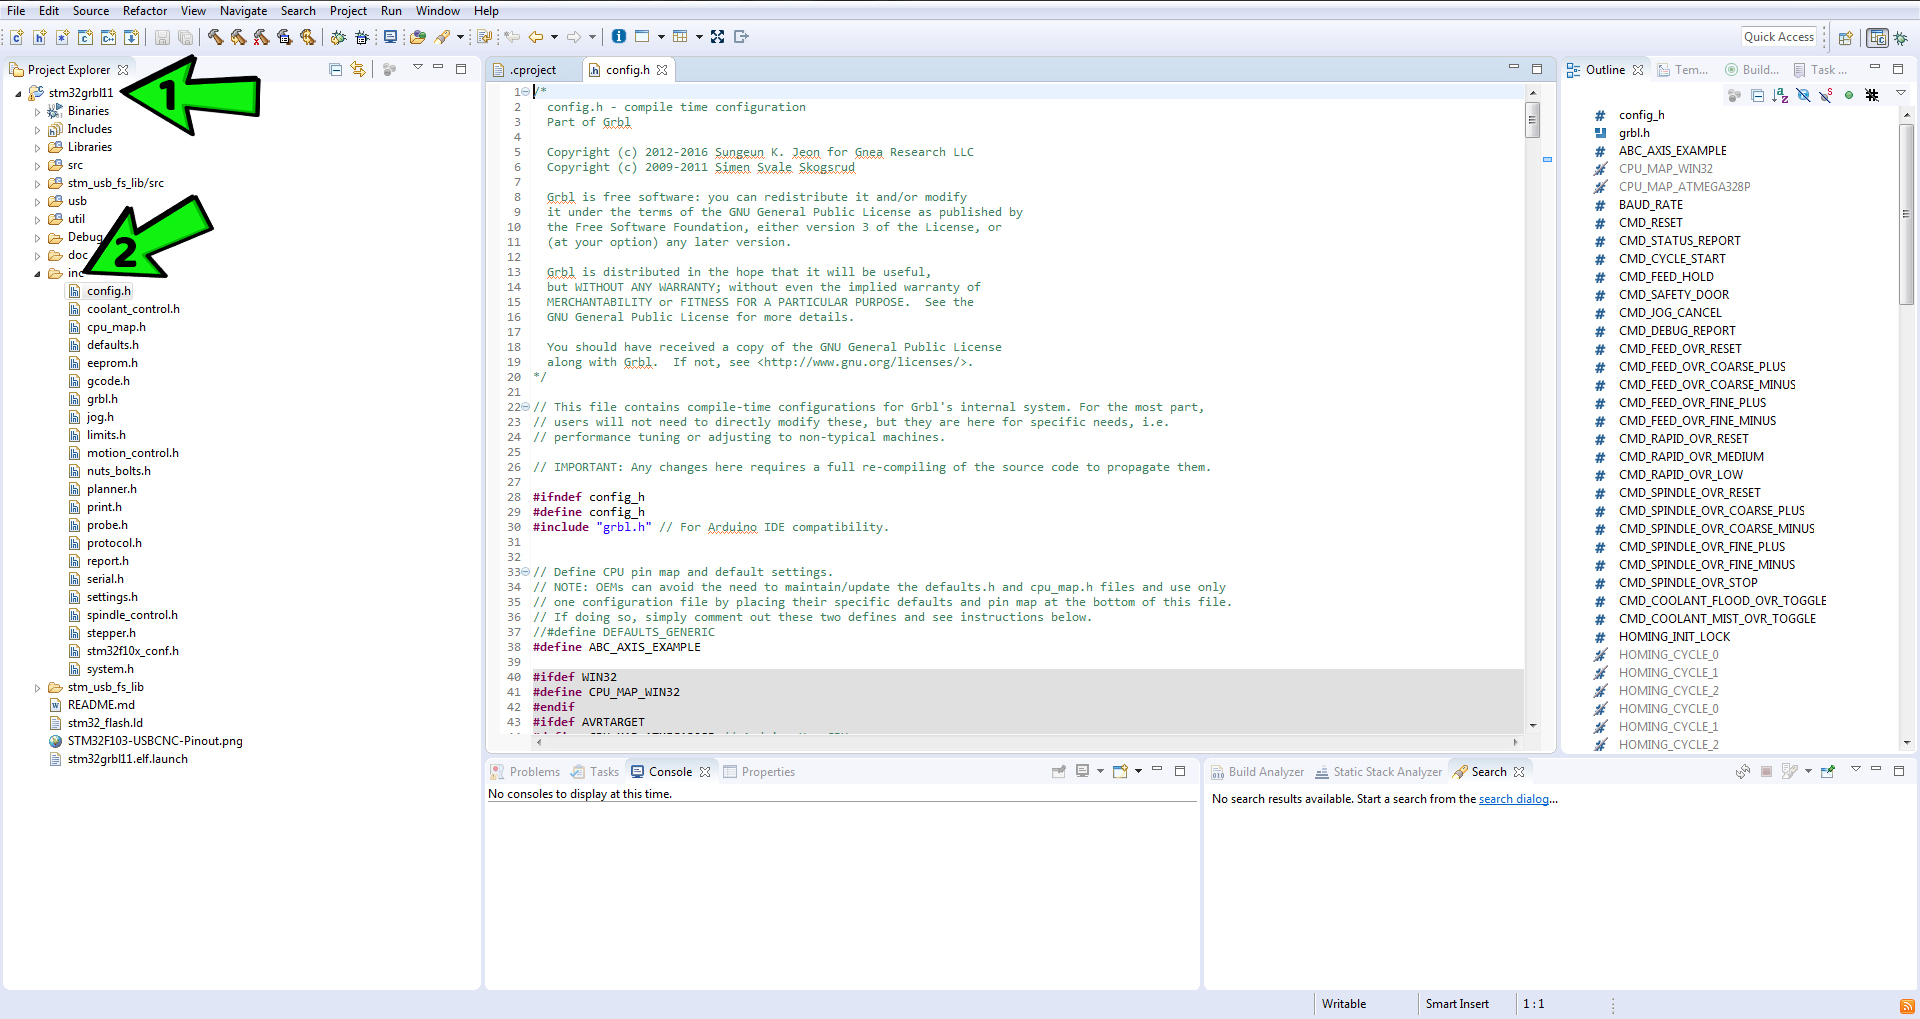
There are several files in the list, but only 3 files can be modified (to adapt the config):
-The file “cpu_map.h” can be edited to change the assignment of some pins.
Attention, the file contains several configurations (for an arduino, for a STM32 with 3 axes, for a stm32 4 axes).
By default, a 4-axis stm32 is active (the others are grayed out).
– The file “config.h” allows to choose a large number of options offered by GRBL (example: homing, hard limits = limit switches, soft limits, coolant, PWM, laser, …)
Read carefully the explanations given in this file
– The file “default.h” allows to specify the default values of other parameters of the machine (max speed, acceleration, inversion of signals, …).
Note that the parameters of this file are only default values.
GRBL allows you to modify these last parameters without having to recompile / reflash the STM32. This is done using GRBL commands, type: $ xx = yyyyy.
See the GRBL1.1 doc for more details.
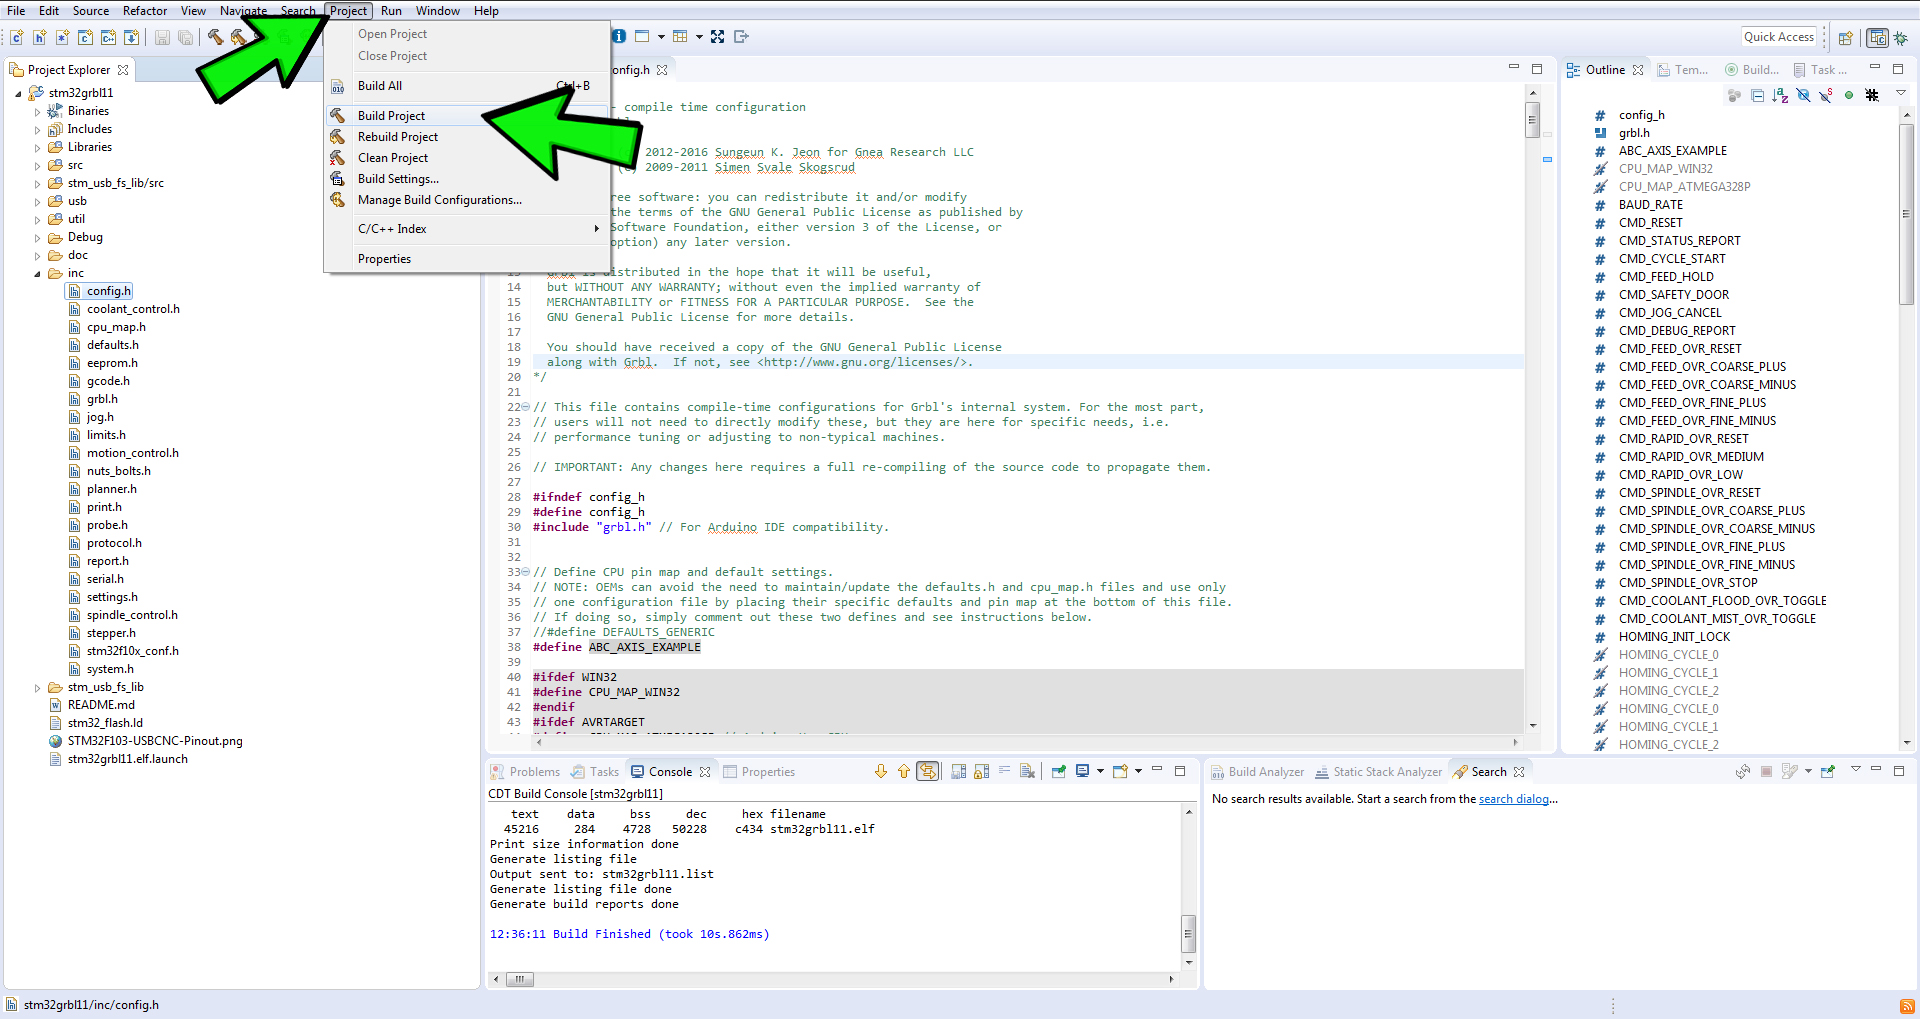
4. Compile
After editing the set up files, compile the program to verify that there are no errors.
To compile, select the “Project” menu and then the “Build project” option.
5. Upload
Remove the STM32 from its socket on the GRBL 32-bit board and connect the ST-link dongle to the STM32 bluepill, respectively connect the 3.3v, Gnd, SWCLCK, SWIO.

Connect the ST-Link to your computer, the driver should install automatically because present in the installation of Atollic.
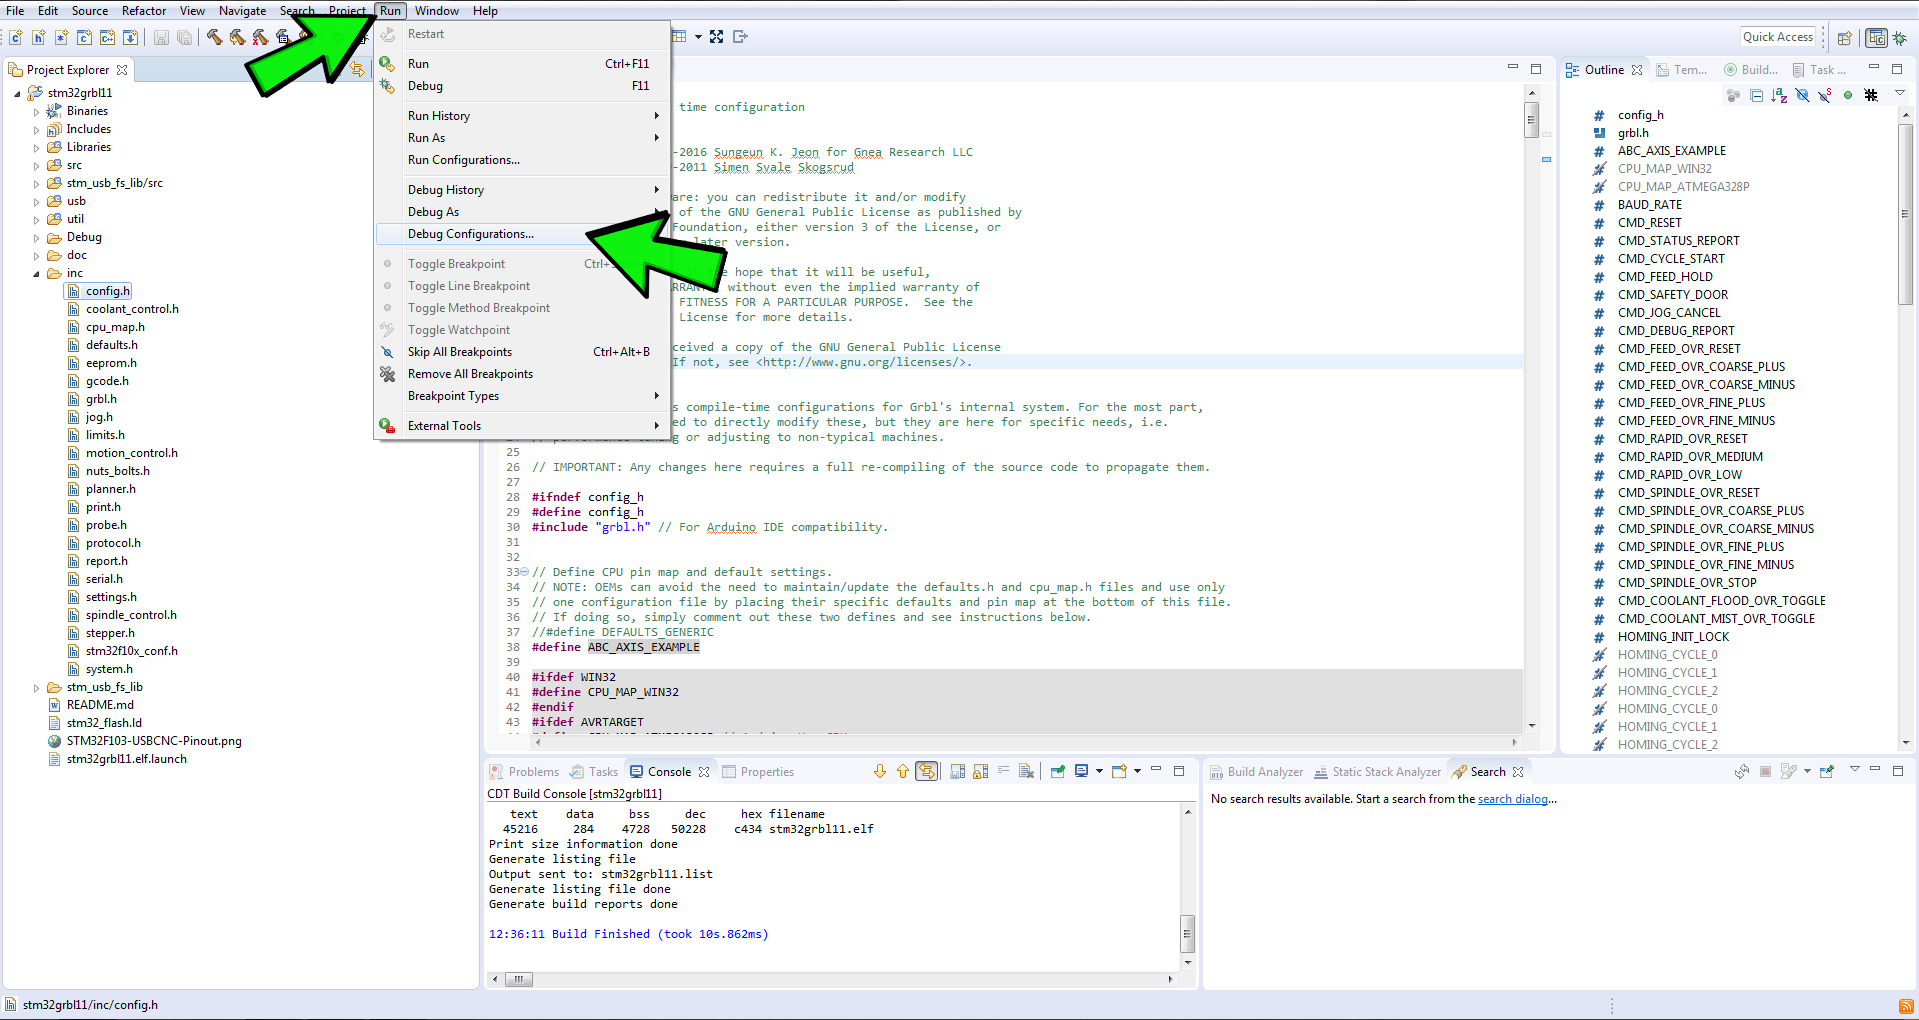
Before flashing the program in the STM32, you must have configured Atollic to use the “STLINK” in “SWD” mode
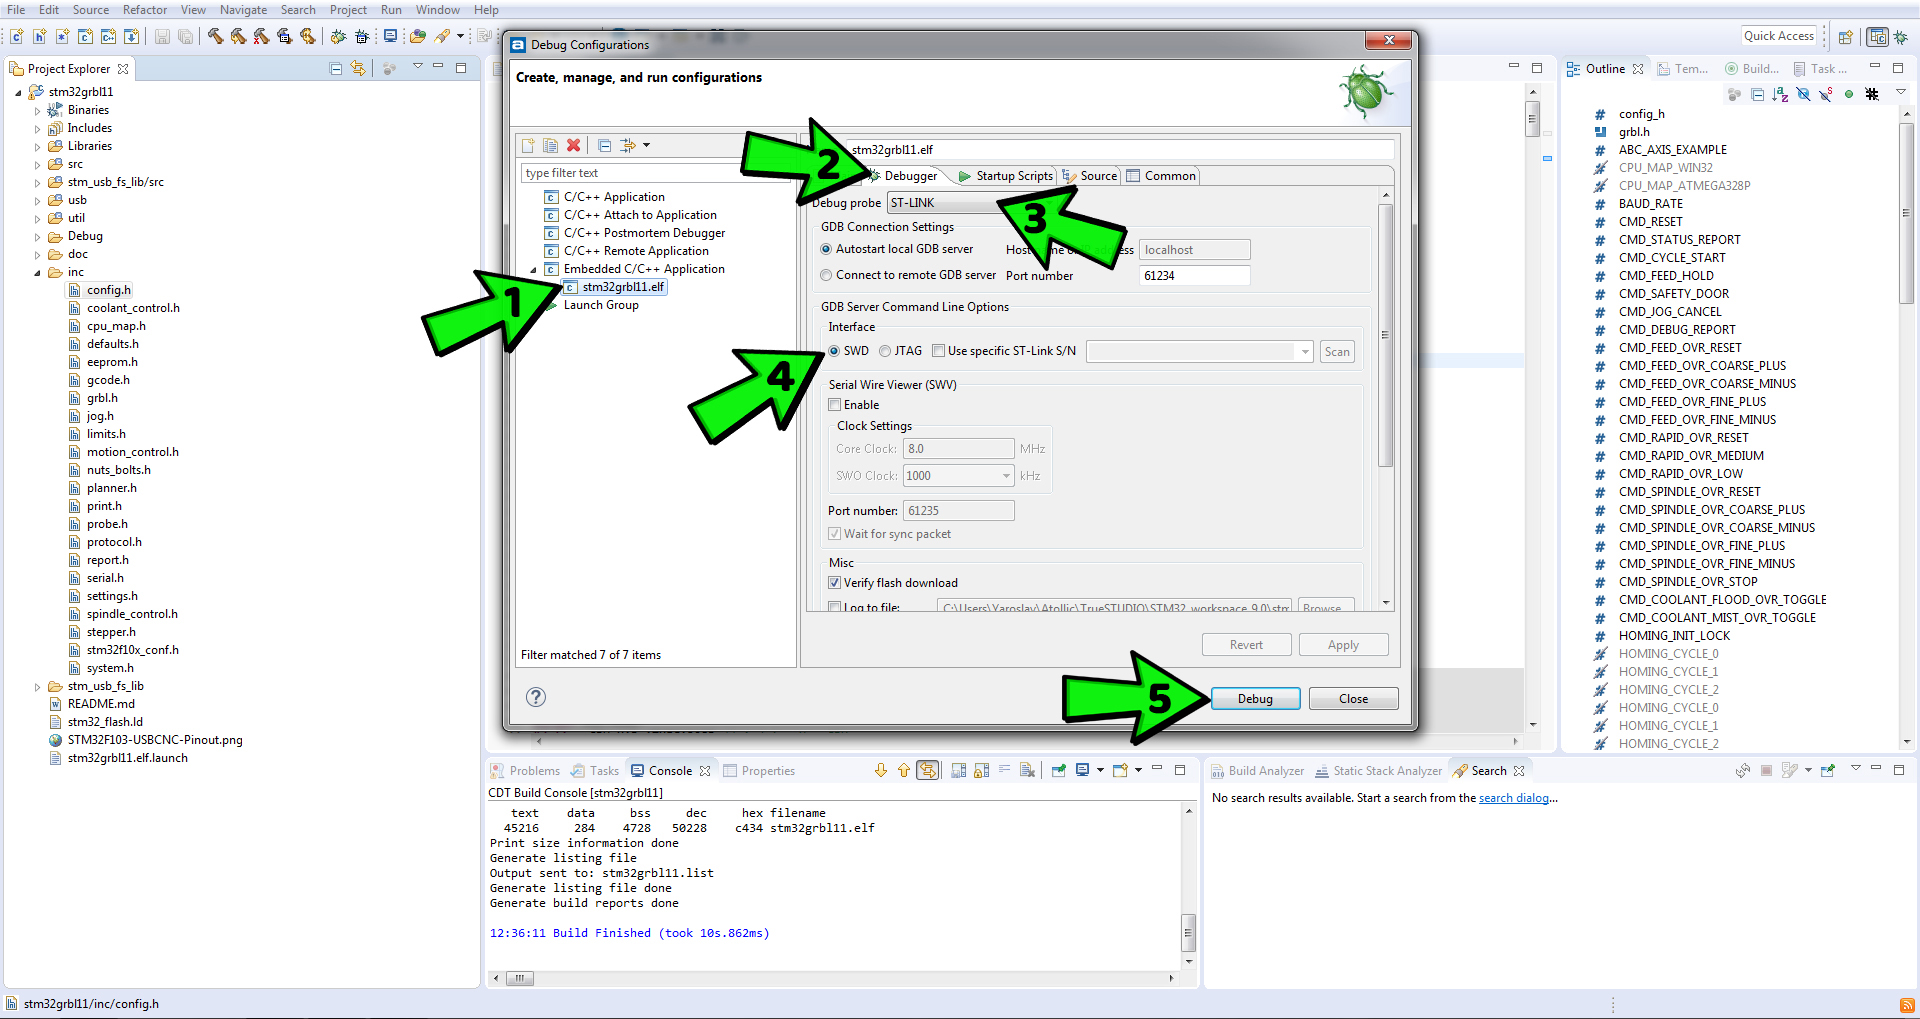
– In Atollic, select the menu “Run” then the option “Debug Configurations”
This opens a new window.
– In the list on the left, choose stm32grbl11.elf (under Embedded C / C ++ Application)
– In the right part, select the tab “Debugger” and choose as “Debug probe” the value “ST-LINK” and as “Interface” option “SWD”, Then click on “Debug”, the upload begins.
Once the upload is complete, click on the little red square “terminate” , and verify that the upload has gone well.


That’s it, you can unplug the ST-link and STM32 Bluepill, it’s ready to use 🙂