Check that the micro-USB cable you have is not just a charging cable with only the 5V power wires and not the data wires … At my place on 8 micro-USB cables found, only one was not a special charging cable! To check, all you have to do is connect an ESP32 to the computer and see if it detects that you have just connected a peripheral, if nothing happens, it’s a USB charging cable!
Download the latest version of the Arduino IDE software, or update it if your version is older than 1.8.13, bring your micro-USB cable and your 2 ESP32 modules, and let’s go!
Step 1: Configure Arduino for our ESP32
(This step 1 is only to be done once, even if you flash your ESP32 several times later)
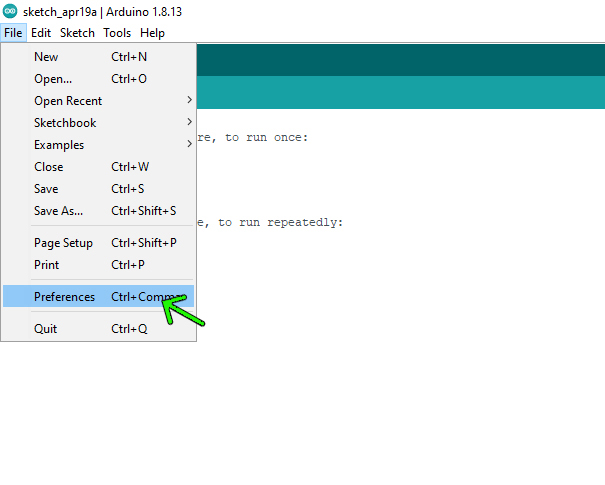
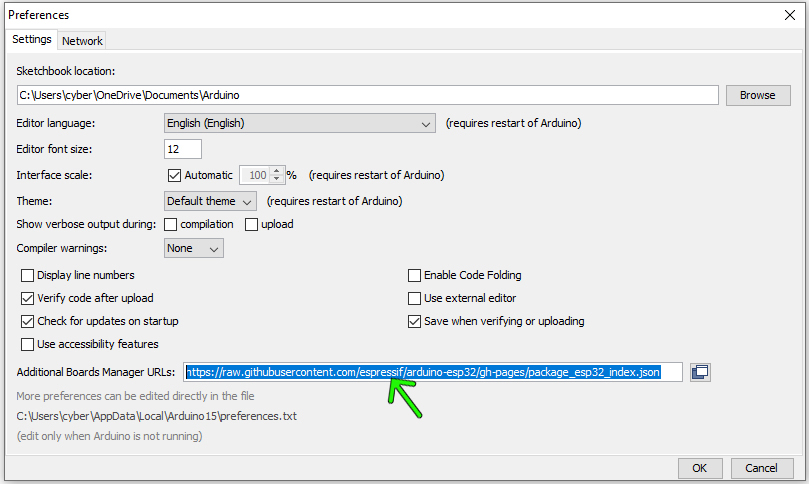
- Go to “File”> “Preferences” ensure that you have this URL in the URL for “additional boards manager URLs” (copy and paste): https://raw.githubusercontent.com/espressif/arduino-esp32/gh-pages/package_esp32_index.json then click on OK.
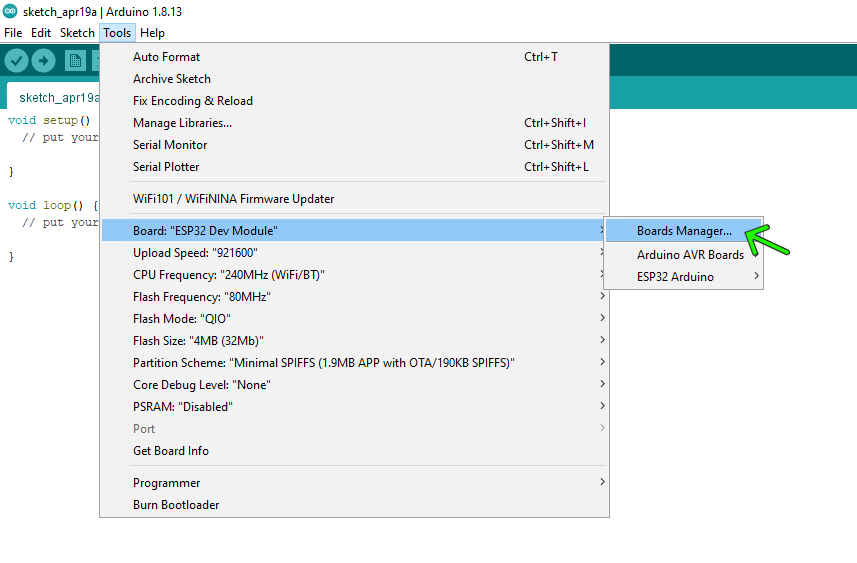
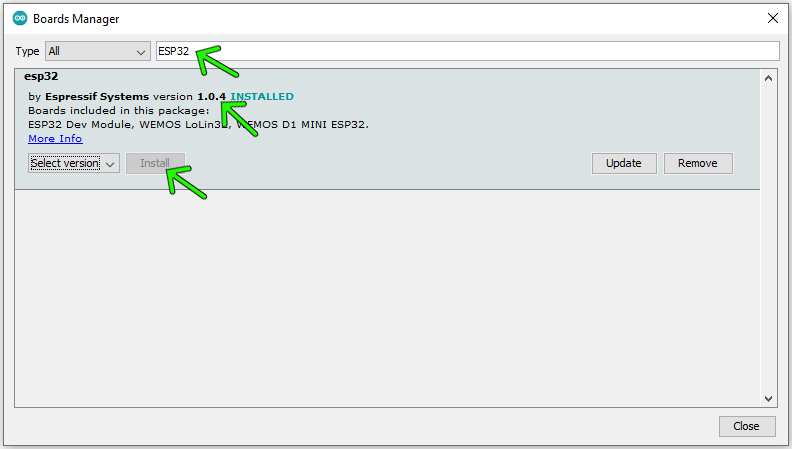
- Go to “Tools”> “Board”, choose “Board manager”
- In the search bar, type ESP32
- Select version 1.0.4 in the drop-down menu /! \ Not the version 1.05 or 1.0.6 which are problematic /! \
- Click on install, once the installation is complete, close the window.
- Go to “Tools” and “Board”, choose for example “ESP32 Dev Module” or “Wemos Lolin32” if the first doesn’t work.
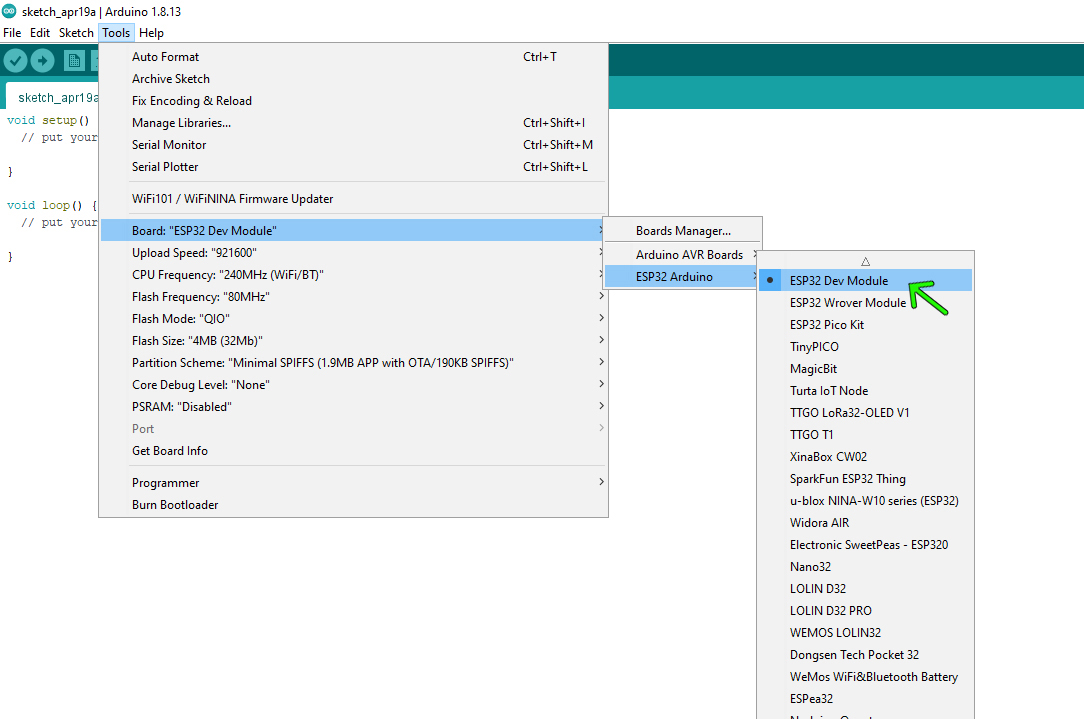
- Go to “Tools” > “Scheme partition”, choose “minimal SPIFFS”

- Download these 3 .zip libraries and don’t unzip them:
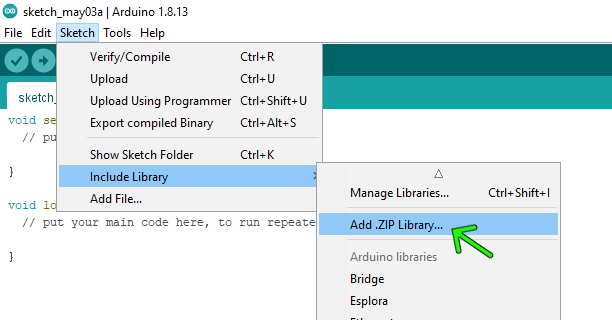
- Go to “Sketch” and “Add ZIP library”
- Select one of the 3 .zip libraries you just downloaded and click on “Open”
- Repeat the operation with the 2 remaining libraries
Arduino is ready to flash our ESP32
Step 2: Flash the firmware of touchscreen ESP32
- Download Touchscreen firmware
- Unzip the folder
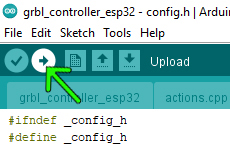
- Click on the file “grbl_controller_esp32.ino”
- The Arduino program opens, and a list of tabs is visible at the top, go to the Config.h tab
- Set the desired parameters such as the language, the wifi (SSID, password, …), the type of board used, the customization of colors, and other … Important: line “#define TFT_CARD_VERSION 1” must be set to “1” for V1.0 and V1.5 GRBL32bits boards

- Once you have done your settings, connect your ESP32 from the touchscreen to a USB port with the micro-USB cable (it’s possible to do this with the ESP32 module plugged into its board, but you must first power up the board because the USB port of a computer does not provide enough current to power the TFT screen to it alone)
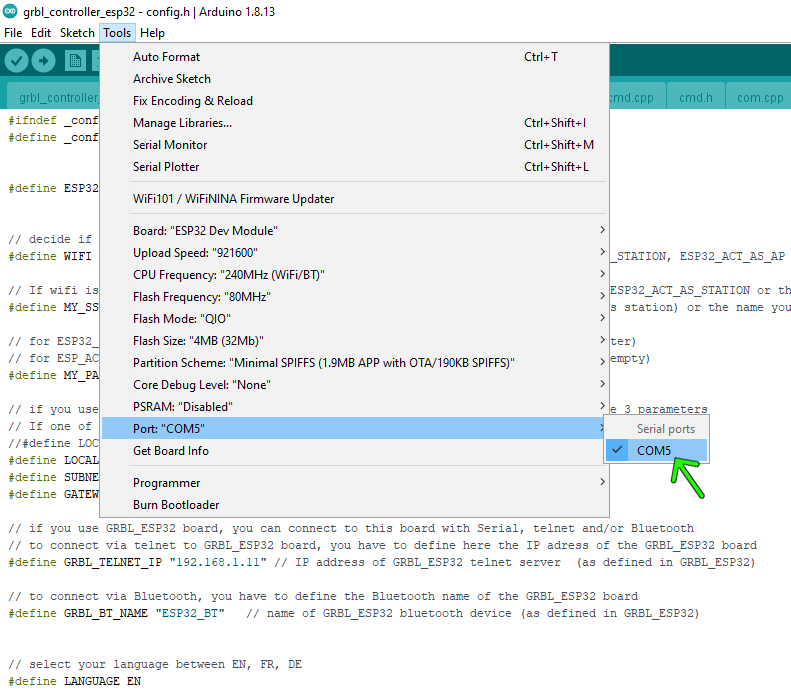
- Select the COM port where your ESP32 is connected in “Tools”> “Port” (for me it’s COM5, but for you the number will certainly be different!)
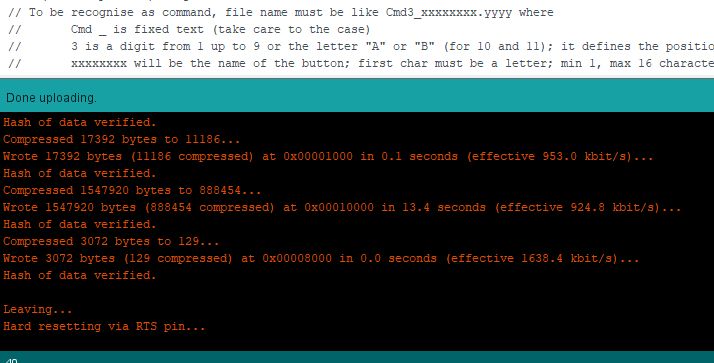
- Now, to upload the firmware, click on the upload icon:
- It can take from several seconds to several minutes before the upload begins
- When the upload is about to start we have a succession of dashes and dots like this:
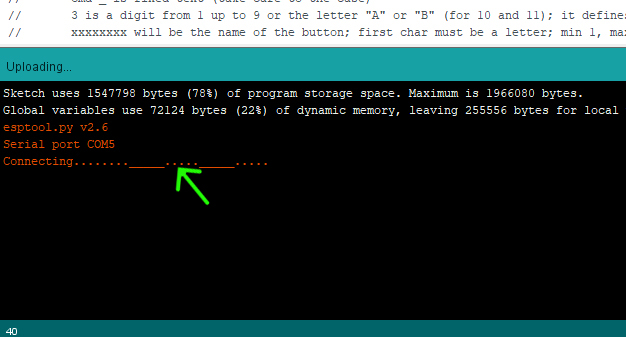
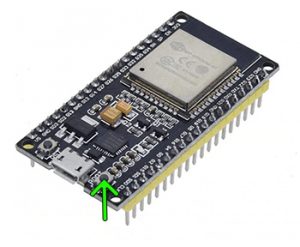
- This is when you have to press the small “BOOT” button on the ESP32 and hold it until the upload begins (see image below) (sometimes not necessary, but this is rare) .
Upload is complete, you can unplug, your ESP32 is ready to be plugged into its TFT board (pay attention to the mounting direction)