There are several ways to configure GRBL, but I suggest this one, which I think is the most fun for beginners.
Step 1: Firt connection to WebUI
WebUI is a web interface accessible by wifi, it allows you to modify GRBL parameters, wireless connections, and manage the machine (movements, launch a file from the SD card, serial console, etc.) Source
- Power on the GRBL board
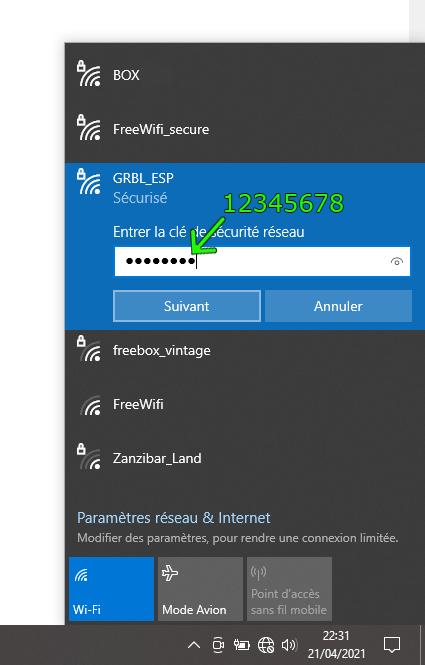
- Open the list of wifi connections available on your computer, you should see GRBL_ESP32 appear

- Click on it, enter the password 12345678 and validate, normally the web browser should open automatically and launch WebUI, if this is not the case, in the address bar of the web browser, type 192.168.0.1
- WebUI opens, you get there:
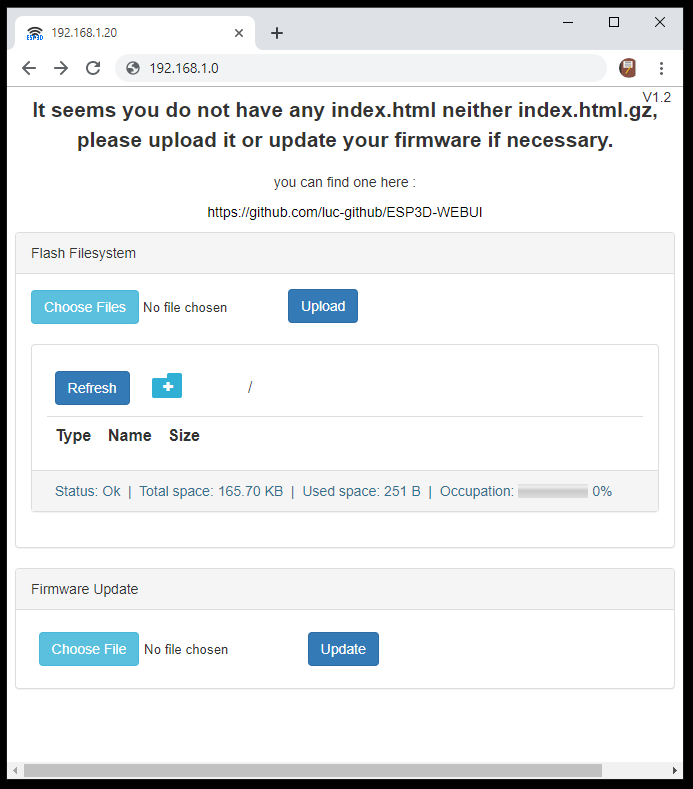
- Click on “Choose files” and point to the index.html.gz file in the GRBL ESP32 firmware folder, Grbl_Esp32/src/data/index.html.gz and click on Upload.
- Once upload finished, refresh the browser by pressing F5
- WebUI launches, click on ESP3D tab

- This section allows you to set the wireless connections, if you have an internet box, enter in the first two boxes the name of your internet box (SSID) and below the password, by pressing “Set” to validate each new change.

- Reboot your GRBL board, reconnect your computer to your internet box.
- Open the Arduino software, in the upper right corner, click on the serial monitor icon (computer is connected to the computer via USB)
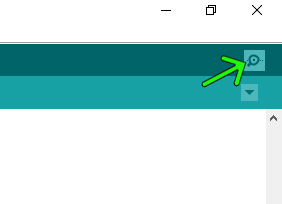
- The serial console opens, in the command bar, type $i, and note the IP address that appears
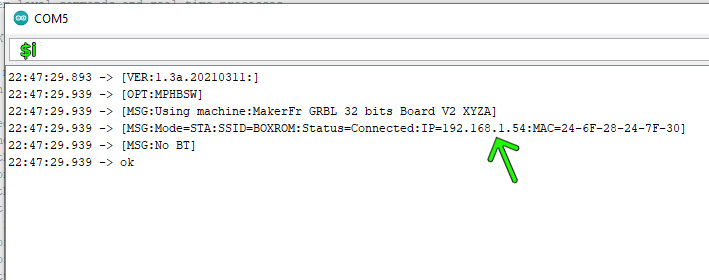
- Close Arduino, open the web browser, and in the address bar type the IP address obtained (it will always be the same to access your CNC from your home network)

You again have access to WebUI through your internet box, and now you just have to do this in order each time to access it:
- Power up the GRBL board
- Open your web browser from your computer, tablet, smartphone or any other device connected to your internet box.
- Enter the IP address in the address bar (create a favorite for those who have no memory ^^)
Step 2: configure GRBL for your machine
Info: this section concerns those who have physically modified the CNCs in MakerFr tutorials or who have mounted the GRBL32bits board V2.0 on a completely different CNC model. For those who have an RS-CNC32 fully compliant with the tutorial, you can skip this part because everything is already configured for.
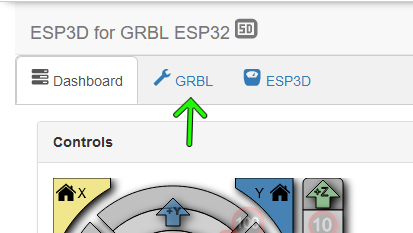
- Under WebUI, go to GRBL tab
In this tab, there is the list of the main parameters of your machine
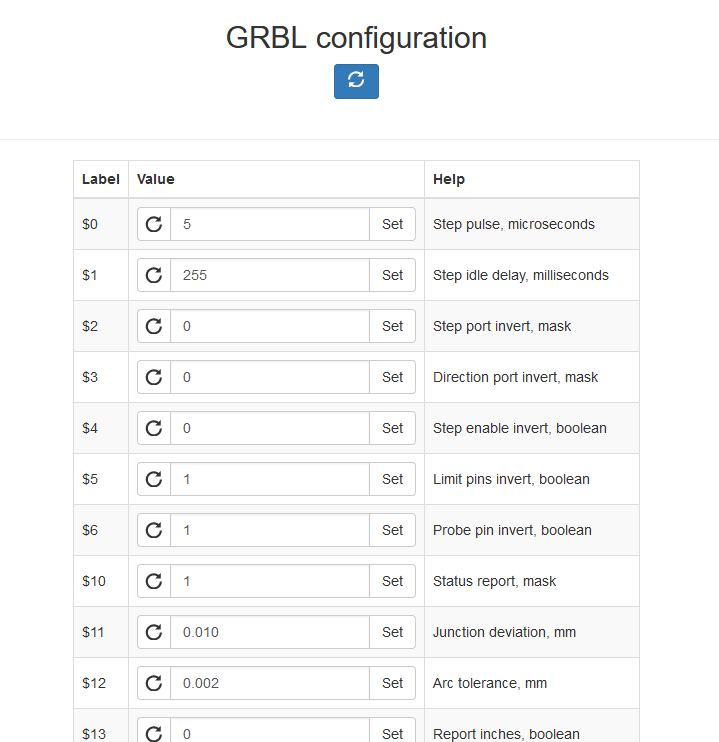
For more details on all these parameters, see the GRBL wiki
Info: It is also possible to modify these parameters via any serial console (like Arduino or GRBL apps on computer or smartphone / tablet) by typing the commands in this format: $ *=*** (ex: $100=60, which means step/mm from X to 60)
Some examples of basic commands:
- $$ -> display parameters list
- $+ -> display exented parameters list
- $RST=$ to erase all parameters modified from the firmware flash
- $i -> informations
- $x -> Unlock alarm
And many others …
I let the most curious consult the GRBL1.1 Wiki and the GRBL ESP32 Wiki
Step 3: First movement tests
- Return to the Dashboard tab of WebUI
- Check that the machine status is “IDLE”
- With the virtual pad on the left, move each axis in both directions
- Check that each axis goes in the right direction and moves the required length
- If one or more axes don’t move the desired length, check the setting of the levers on your drivers, or the value of steps/mm in your GRBL configuration.
- If an axis goes in only one direction, check your wiring of the driver DIR cable
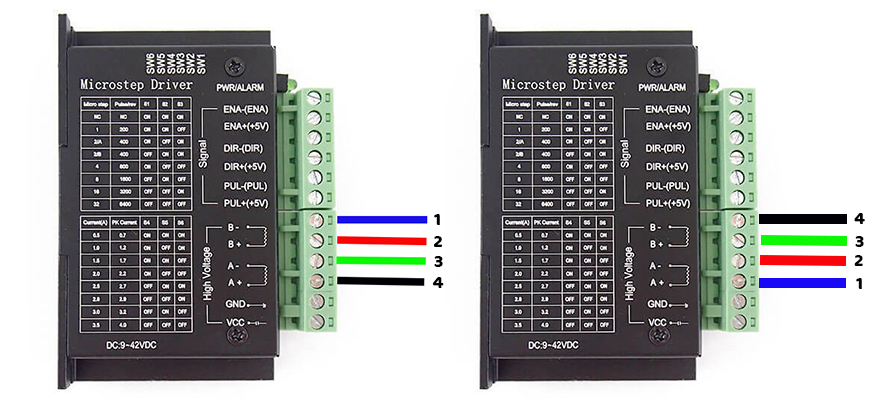
- If an axis makes a growling noise and barely moves, the 4 stepper motor wires are not connected in the right order, don’t rely on the color of the wires, use a multimeter to locate the two motor winding pairs.
- If an axis goes in the wrong direction, invert the connection of the 4 motor wires by 180 °: