From .dxf to .gcode
To mill your first part, usually we start from a “.dxf” file, either downloaded or created by your favorite CAD software.
This DXF is a drawing called “vector”, to make it simple and short, what differentiates it from a jpeg for example is that it contains information, for example, such hole is in such a place and of such diameter, this line at such place measures so many millimeters …
It’s all well and good, but our machine does not recognize this DXF! Indeed, it is not machine language, it must be transformed into machine language, in .gcode.
The G-code him, is a script that has each line gives an order to the machine for example X and Y go to such position at such speed …
To do this we need a G-code generator software, for example:
- Estlcam ,really cheap and the trial version is unlimited, just a countdown before the generation of the g-code to encourage us to buy and above all, it is HYPER easy to use, top to start without getting lost in the options.
- Fusion 360, complete, it allows to create its 2D and 3D files as well as generate G-code for 3D and CNC printers. If you use Fusion360, please use this post processor.
I will not do a tutorial on these programs, you will find many on internet.
Whatever your G-code generation software, check the G-code start and End G-code options which must contain the spindle start / stop commands that control the relay (M3 at start G-code for start the spindle) (M5 end G-code to turn off the spindle) On Estlcam it is already set to original.
Set Estlcam for GRBL:
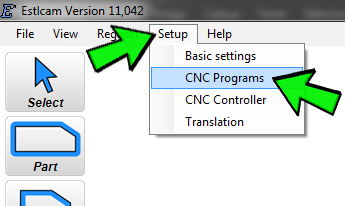
Go to Setup > CNC Programs
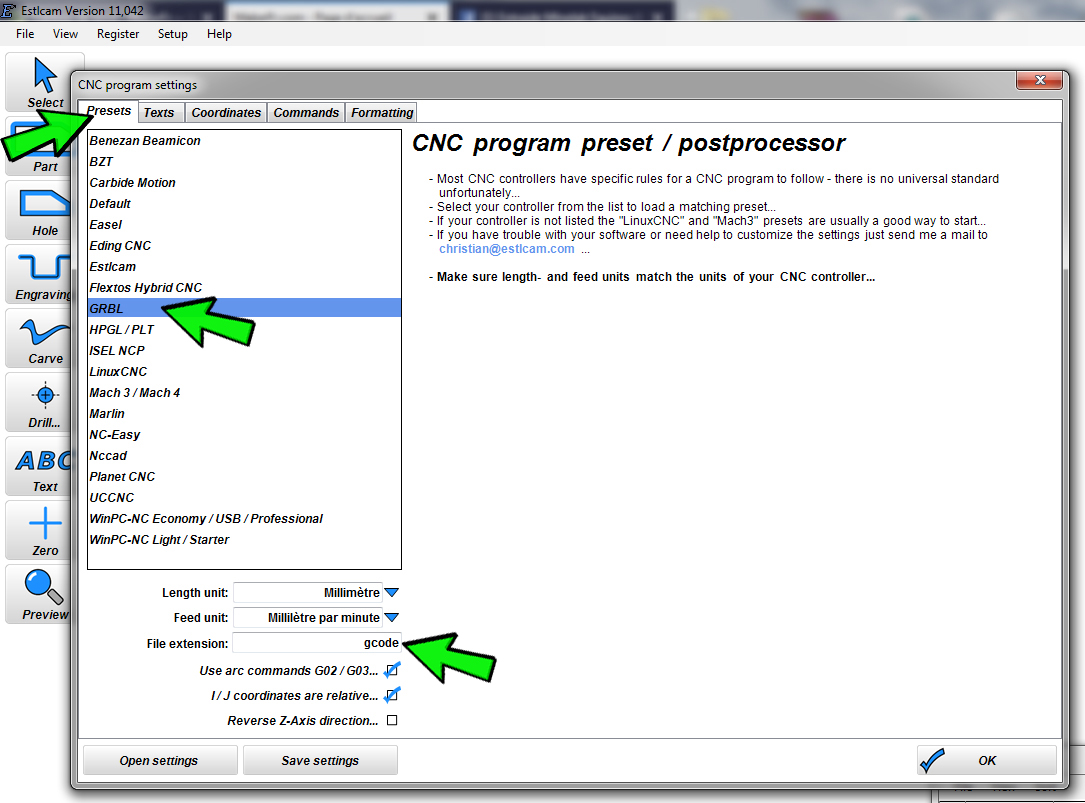
On the “Presets” tab, choose “GRBL” from the list and at the bottom in “File extension” write “gcode” and save
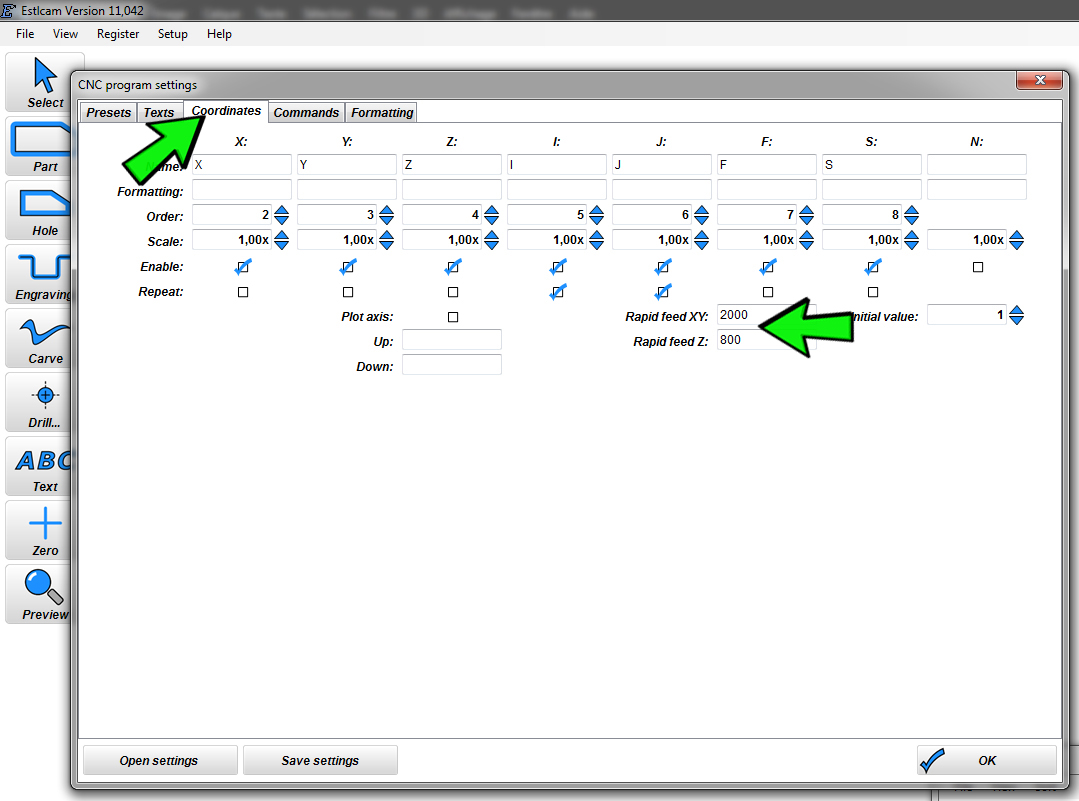
Then to have a fast empty movement, go in the tab “Coordinates”, and in the boxes “Rapid feed XY and Z” indicate the desired movement speed (I put 2000 and 800mm / min) and save.
Now import your .DXF file, set up your machining (there are tutorials on the internet) and save the obtained .gcode file on the SD card
Example of RS-CNC32 first use
- Insert SD card containing your .gcode file into the TFT SD slot
- Fix your “raw” (your material to mill) on a “martyr” (wood panel generally in soft wood that one puts between the tray and our workpiece to spare our beautiful tray!)
- The workpiece is tightened so that it does not move with the help of clamps, and it is checked whether during the machining path there is not a given moment when a clamp will end up on the way of the end mill … yes it would be sad ^^
- Mount a end mill adapted to the material, and of the same diameter that had been entered in the g-code generation software.
- Put the end mill at the “point of origin”, at the starting point of the program, it must correspond to the point of origin that there was in your software of generation of G-code, in general it is bottom left on the software, so to you left on the part to be milled. So move the axes using the Nunchuk or the “Move” function of the TFT if you have big moves to make. When you are very close to the point of origin, finish by hand, once you are good in X and Y, get Z down to the workpiece, you can use cigarette paper to be precise.(or use a Z-probe)
- Now that our end mill is at the origin point, check on the TFT that the “Wpos” position of the machine is at 0 on the 3 axes or at 0 on X Y and the value of the offset Z if you have used a Zprobe. If this is not the case, go to the “Set XYZ” section of the TFT and set the axis values to 0.
- We check that the switch on the spindle is “on” (but does not turn because it is the relay of the shield that will start at the launch of the job).
- We choose its program file on the TFT in the “Mill> SD TFT or SD GRBL” section, validate the file and go, we see the spindle and the job start.
- At the end of the program, X and Y return to the starting point and the spindle stops
Precautions to be taken at each machining
- Wear protective goggles and especially a dust mask during machining and cleaning of the machine, think that MDF dust and carbon are very toxic.
- After each use, vacuum with a vacuum cleaner dedicated to the garage (not that of your bedroom) and blow a blow on the belts, pulleys, threaded rods, motors, TFT, chains cables cables … (keep the dust mask)
- If you have children, remove the power cord
- The machine must remain under supervision during machining.
- Of course I am not responsible for any physical or material damage!
Maintenance
- Check the correct tension of the belts and the perpendicularity of X/Y
- Check for dust on the electronics
- Check that the height of the tray is always set correctly
Tutorial is finished!
For any technical questions, please only use the forum (there is an English international section)
For all other non-technical questions, you can contact me at romaker@makerfr.com